Showing posts with label How To. Show all posts

Friday, 13 October 2017

Download Google Pixel 2 Launcher APK on Your Android Phone


The Google Pixel 2 and Pixel 2 XL is due to arrive soon and while we are still waiting heartily for the acclaimed device, there is a need to get most of its apps on our current Android phone. Google's yearly tradition of tweaking the Pixel's UI makes the device to look quite exceptional, and if you have been spending the past few days on YouTube (just like me) watching the Pixel 2 in action, then you'd agree with me that the newest Pixel launcher spotted on the Pixel 2 XL brings a ton of attractive features. Previously, we wrote an article on how you can make Nova Launcher to mimic the Pixel 2 Launcher, we also went further to offer you all of its widgets and wallpaper. Hopefully today, I'm pleased to announce that the latest Pixel 2 launcher APK is available for download.


So if you think following the Nova launcher recipe is cumbersome, you can try to install the Pixel 2 launcher APK since it brings all of the Pixel 2 exclusive features. One of the changes you will notice on the new Pixel 2 launcher is the search bar which has been moved down to the bottom to replace the dock we where once used to on the Pixels. The colored G logo present in the search bar widget has also been tweaked a little bit to showcase transparency but their actions has not been changed so far.


At the top, we have the new "at a glance" widget that provides informations such as the weather condition, calender info and clock. The app drawer looks quite neat too and beautifully arranged. The latest Pixel 2 launcher we're going to present also spots a Google Now integration that's accessible from the side of the display. So if you'd love to get the pixel launcher on your Android phone, then here we go.


Download Pixel 2 Launcher

To begin with, download the latest Pixel 2 Launcher apk on your Android phone and install it ASAP. If you're faced with any error such as "App not installed", you can install the modified version of the Pixel 2 launcher on your device. Alternatively, you can choose to download the zip file of the latest Pixel 2 launcher and flash it via custom recovery. Overall, enjoy the new Pixel 2 Launcher on your Amdroid Phone.

Source | Xda.

Wednesday, 11 October 2017

How to Get LG V30's Floating Bar on Your Android Phone


LG V30 is a strong device that offers lots of plethora features. The camera is one of the best feature that's capable of unleashing the cinematographer in you, the device goes as far as bringing the Google assistant built-in and a face recognition that unlocks your device's screen with just a scan of your face. LG's flagship device has always been the V-series, and the company have maintained a common tradition of enabling secondary display on its mobile (LG V10 and V20 boosts of this feature).

Upon the production of the V30, LG had to ditch the "second screen" for a floating bar which creates a shortcut for your favorite apps and call notification and it's accessible from the V30 display . This feature was necessary in other to attain a classic look for the device. If you've gotten a chance to look at LG V30's customizable and virtual floating bar, then i guess you love what you saw and hence wish to try this feature on your Android phone. Don't worry, we have got you covered..

Install Floating Bar

The app that brings LG V30's floating bar feature on Android is dubbed Shortcut bar. It gives you quick access to your favorite apps, tools, website and even contacts. So head to the Google Play Store and download floating bar apk.

Add App Shortcuts

The next step is to open the app, you will be greeted with a simple interface. From here, simply tap on the icons to choose an app as a shortcut. You can rearrange them too. Repeat this steps for other options (tools, contacts and websites). Once you are done with the setup, click on "Show apps on floating bar" then toggle the floating bar icon at the top right corner of the screen.


Enjoy LG V30's Floating Bar

Now you'll see the floating bar at the side of your device's display, simply tap on it to see the lists of app shortcuts you created. One thing that amazes me about this app is that it's accessible even at the lock screen and when you're using another app.


The floating bar is moveable, but you can only drag it when it collapse. There are four categories within the app, with an option to enable/disable each categories separately. By default, only the "app" category is unlocked. So you'd have to support the developer to unlock other categories and enjoy more features.


How to Get Nokia 8 Dual-Sight Mode on any Android Device

Love Nokia 8 "Bothie" feature? Then there's a way to enjoy that experience on your smartphone. So if you're ready to use your iPhone or Android to take pictures with both the front and rear cameras at the same time, then here's how to get started...

Bothie
Image via recombu

Android or iOS device. Nokia 8 was made official on August and so far, it's HDM Global's highest spec Android phone tasked with returning the "Finnish" name back to its glory. The flagship runs on Android 7.1.1 Nougat and it's plastered on Qualcomm Snapdragon 835 with 4GB RAM and 64 GB mass storage expandable with 256GB MicroSD card. The device also brings support for livestreaming video to Facebook and YouTube. One of the futuristic features you'd find on Nokia 8 is the Dual-Sight mode that allows its users to use both the front and back cameras simultaneously for split-screen photos and video.
Nokia 8 Bothie feature
Nokia pouted this feature as 'Bothie' and it's an advancement to the regular Selfies we're used to. You do know that feeling, when you are taking a photo of your friends & realised that you are the only one 'left out' of that beautiful moment since you're holding the camera. Well Nokia wants to change that feeling positively by letting you share your emotions together with your friends at the same time. While the Nokia 8's Dual-Sight mode is exclusive only for the device, there's also a way to get it on Android and iOS. So if you want to experience this bothie feature, you can get started with this apps.

1. Frontback

frontback
Image via Smartprix

Frontback is one of the best apps that can mimic Nokia 8 'dual-sight' camera mode experience. The app lets you combine your device's front and back camera to captures multiple sided photos at once. One cool stuff you'd like about this app is that the photos are always in full screen mode, and you can go as far as applying effects to the second photo. Moreover there's an option to switch between capturing a single picture and two sided photos. The app is quite handy when it comes to taking "frontbacks" together with your friends.

Get it on Android iOS.

2. Bothie


Just as the name implies, bothie is another cool app that let's you use both the rear and front cameras at the same time to capture awesome photos of your family and friends. The app is easy-to-use, as it automatically switches to front view when you've taken a back view image. Once you have taken both images, (albeit not at the same time just one after the other) they will be merged together into Bothie and saved to your gallery. Hence you won't be left behind in that best moment of your life as you're been included too. Download and install Bothie from Google Play Store.

Get it on Android.

3. Front & Back Camera


Another popular app that can bring Nokia 8 Bothie feature to your Android & iOS device is front and back camera effects. The app just like its colleagues, lets you take pictures with both the front and back cameras and it will combine them into one single photo. This process doesn't require photo editing & the app supports changing between protrait and landscape mode. Taking flipside picture with this DuoCam app involves using the back camera to take a photo of your friends and the front camera to capture your own reaction. It's as simple as that!.

Get it on Android

Bonus Tips For Galaxy S8 Users

Similarly, there's a dual camera mode app available for the Galaxy S8 and it lets you take a picture from the front & back camera at the same time. This "feature" was first introduced on the Galaxy S5 and you can as well get it on your S8. To do this, open the Galaxy S8 camera app, swipe right to access the "photo more" option. You'll see a + sign, simply tap on it to enter into the "Galaxy apps store". From here, search for the dual camera mode app and download it. That's it. There are other apps such as phoTwo and they allow you to take simultaneous photos with both the front and back cameras. You should try it out too.

Monday, 9 October 2017

How to Get iPhone X Features on Android


iPhone X is one of the most sensational device that offers plethora features. But the price tag isn't something you can swallow easily, and you'd have to wait a little bit longer until the device ships into the smartphone market.
get-iphone-x-features-on-android
Image: TechCrunch via YouTube
Apple's iPhone X brings a completely overhauled design, with spectacular edge-to-edge display that nearly covered the entire front of the device. This is one of the exceptional concept that made the device stand aside from its mates​. iPhone X/10 brought some cool features that are quite rare in older iPhones. Most of this features includes notch, face ID, animoji and the 'all new' gesture multitasking. While many technophiles will prefer to wait until November 3 to get this features, geeks who are eager to try something new won't take that chance. Therefore, we'll have to use a workaround to get most of the iPhone X features on Android.

1. Notch

iphone-x-notch

Have you seen that weird bump on top of the iPhone X screen? It's called notch. Apple integrated it when they introduced the new Face ID (a replacement for Touch ID). While some thinks the notch is cool, my opinion is contrary to that. But the notch is connected to the Face ID which uses infrared camera to scan your face and unlock your phone. If you're​ eager to get the new iPhone X notch on your Android phone, then XOutOf10 will surely help you with that. The app simulates iPhone X notch on your device without root access and you won't have to spend $999 to get this feature. Grab the app on Google Play Store now and enjoy the camera notch that covers the iPhone X screen on your Android phone.

2. Face ID

iphone-x-face-id

The introduction of Face ID on iPhone X is a great concept, as you won't have to go through the hassles of unlocking your phone with password. iPhone X Face ID scans your face through the infrared camera and thus your device gets unlocked and you can log into it. There's a similar app on android that can give you that functionality and that's Zoom Login. The app uses a 3D facial recognition algorithm and ultra-secure selfie-style face authentication to unlock  your smartphone. Alternatively, there is an inbuilt "Smart Lock" feature on Android 5.0 lollipop that unlocks your phone using your face. Go to settings and see if it's there, then set it up.

3. Gestures


If you decide to buy the iPhone X, then you'll have to re-learn how iPhone works. Apple ditched the Home button on the iPhone X to introduce a bottomless display and in this way, you'll only access iPhone X menu by swiping up from the bottom. This gesture comes quite in handy for multitasking, and you can use All in one Gestures for Android to get iPhone X swipe-to-go-home gesture. The app hides your device's soft keys and allows you to control your phone with simple gestures. One of the plethora features it offers is the ability to enable immersive mode on device running on Android 5.0 lollipop. So get the app, set it up, swipe your finger across the screen and the action you want will be performed.

4. Animoji

iphone-x-animoji

Animoji is one of the features introduced in iOS 11, it is simply the animated version of the popular emojis found on older iPhones. On iPhone X, animoji will use the Face ID recognition to create custom 3D emoji based on your facial expressions and this will be animated in-real time before you send it across to your recipients as a looping video with audio. With iPhone X, you'll be able to create cool animated emojis​ based on a scan of your face. For Android users, you can try this Animoji for Phone X app, since it creates stunning emoji of your eyes and face. The app doesn't bring an exact animoji functionality as seen in iPhone X, but it's close to it.

Final Words

iPhone X offers lots of handy features that'll make your smartphone experience easy. It isn't an overpriced piece of metal, and you'd love the device for what it is. So if you're an Android user, and you want to show your friends what the open source operating system can do, then the above iPhone X feature can help you with that. They're simply the best, go grab them now!.

Sunday, 8 October 2017

How to Make Nova Launcher Look Like the Pixel 2 Launcher


Google​ Pixel is passé, and the acclaimed Pixel​ 2 and Pixel 2 XL have arrived. For one thing, the new pixel launcher integrated in pixel 2 has been completely overhauled and this time around, it brings a simple and clean home screen utility that's quite attractive. One of the "remake" you'd notice on the new pixel launcher is that the search widget has been moved to the dock and this has been replaced with a weather widget. Since the new pixel launcher hasn't been leaked yet, the good news is that you can setup Nova Launcher to look and feel like the Pixel 2 launcher. But before we get into the how to of this thing, we'd like to remind you that most of the 'Settings' (we are going to use) aren't available in the free version of Nova launcher. So make sure you've got the Nova Launcher Prime  installed, or you can simply go for the beta version which is completely free.
Also Read: How To Get Rounded Display Corners On Your Android Phone.
When you open Nova launcher, tap next to skip the introductions and ensure to set it up as your default launcher. From here, I'll suggest you remove all the apps & widgets on the homescreen so that we can have a "fresh start". Now i am going to make the instructions as brief as possible, so we'll be breaking everything down by category. But before we begin, download the Pixel 2 Stock Wallpaper and set it as your default wallpaper. Now open up "Nova Settings" by long-pressing on the "homescreen" and then follow the guides below.

Update: Google Pixel 2 Launcher Apk is here.

What to Change in "Desktop" Settings

When you open "Nova Settings", the first option you will see is "Desktop". So we are going to tinker within this option to disable the app label, adjust padding and also turn of page indicator as seen in the home screen of Pixel 2 launcher. So head into the Nova launcher "Desktop" settings and change the following..
  • Desktop Grid: Change this to 5 rows by 4 columns. Tap “Done.”
  • Icon Layout: Change the size to 120% and disable the "Label" option.
  • Width Padding: Set this to “Medium.”
  • Height Padding: Set this to “Medium.”
  • Persistent Search Bar: Toggle this On.
  • Search Bar Style: Select the white oval (i.e. the first option under "Bar Style"). Scroll down to "Logo Style" and select the colored "G" logo. Now go back to the home screen and long press on it. From here, select "Widgets" and then find the "Quick Search Bar" under Nova launcher. Drag it to your homescreen and long-press on it. Then tap "Resize" and adjust the widget to match the width of your screen.
  • Scroll Effect: Set this to "Simple". Then tap "Done".
  • Page Indicator: Set this to "None."

What to Change in App & Widget Drawers

Next up, jump into the App & widget drawer which is the second option found in Nova Launcher Settings. From here, we're going to enable the "Swipe up" gesture to open the app drawer as it is seen in Pixel 2 launcher. So jump into the App & widget drawer menu and change the following...
  • Drawer App Grid: Set this to 5 rows by 5 columns. Then tap “Done.”
  • Icon Layout: Change the size to 120% and set the Label to “Condensed." Tick the bar to turn on "Single Line."
  • Frequently Used Apps: Toggle this On.
  • App Drawer: Set this to “Vertical.”
  • Card Background: Turn this off.
  • Swipe to Open: Toggle this On.
  • Swipe Indicator: Toggle this On.
  • Background: Make this white and set the Transparency to 0%. 
  • Enable Fast Scrollbar: Toggle this On.
  • Scroll Accent Color: Set it to teal (it’s the first option in the fourth row).
  • Search Bar: Toggle this On.
  • Scroll Effect: Set this to “Simple.” Then tap “Done.”

What to Change in Dock Settings

Now jump into the Dock menu and set only this option..
  • Dock Background: Set the "Transparency" to 100%

What to Change in Folders

Here, we're going to change some few things in the 'Folders' section of Nova Launcher. So jump in there and change the following...
  • Folder Preview: Set this to “Grid.”
  • Folder Background: Set this to “Pixel Launcher.”
  • Background: Set this to white, with a Transparency of 0%.
  • Icon Layout: Change the size to 120% and change the Label to “Condensed.". Tick the bar to turn on "Single Line."

Optional - What to Change in Look & Feel

We have some stuffs to set up here, so jump into the Look & feel section found in Nova settings. From here, change the following...
  • Adaptive Icons: Toggle this On.
  • Adaptive Icon Shape: Set this to "Rounded" (Default).
  • Mask Legacy Icon: Toggle this On.
If you're not on Android lollipop and above, then the above option won't be available. So to get the pixel rounded icons, you'll need to download and install the Pixel Icon Pack. Then head into the "Look & Feel" menu in Nova settings. From here do this....
  • Icon Theme: Choose "Pixel Icon Pack."

What to Change in Notification Badge

Lastly, we are going to tinker with the "Notification Badge" in Nova Settings. So jump in there and change the following...
  • Change The Style: Set this to "Dots."
  • Position and Size: Select your preferred position and set the size to "Small."
Once you're done, everything will look like the Screenshot below..


Get all the Pixel 2 Widgets

Now we're done, but there's one thing left to be done. We will need to add those beautiful look at a glance widgets found in the pixel 2 home screen. This widgets shows handy informations such as calender events, time, date and weather. So to get this one going, head to the Google Play Store and install Zooper Widget Pro.  Next download the Pixel 2 search bar and calendar/clock events  widgets​. Then place them inside ZooperWidget/Templates on your SD card. Next up, long press on the homescreen and select "Widgets". Scroll down and drag the 4×1 Zooper Widget to the homescreen just at the bottom.


Now long press on the widget and resize it to match the screen. Then tap on it, select SD Card and choose Pixel 2 bar. From here, click on "Widget OnTap Action" then swipe to "App List" and select Google. Scroll down to "Scaling" and adjust the > to 82. Now repeat the step for the pixel 2 event​ widget. If you see a "?" When applying the calendar event widget, tap on "Force Update".  Once you are done tweaking everything, then your home screen UI will look exactly like the Pixel 2 interface. That's it, you've successfully made Nova launcher to look exactly like pixel 2 launcher. Now drag your favourite app icon to the home screen and position it just above the search bar.


Saturday, 7 October 2017

Access Region Restricted YouTube Videos Without VPN or Extension


access-region-restricted-youtube-videos

Except on blocked countries, the video sharing website - YouTube is accessible worldwide. The major reasons why some countries are restricted from accessing YouTube videos is due to hate speech or criticism. Of course there's a workaround to this exasperating issue, as you can access most of the videos on the platform through VPN or proxy servers. But in this article, we're going to show you how to access Geo Restricted YouTube videos without VPN or proxy servers. Before we begin, below are the highlights..
  • Bypass and watch YouTube videos not available in your country.
  • Access geographical restricted YouTube videos
  • Fix this video is not available in your country.
  • Bypass YouTube regional filter without VPN or extension.
When it comes to video streaming, we'd give the credit to YouTube. YouTube is no doubt, the second most popular website globally and it allows its users to upload and even watch numerous videos that are beneficial. If you're addicted to YouTube (who wouldn't be) and you're unfortunate to live in one of the isolated or blocked countries, then you might've been faced with frustrating errors such as "the uploader has not made this video available in your country​" or in most cases, you'd be confronted with "you're not allowed to watch this video, Geo Fencing Restriction".

The main reason why you see this error is because YouTube has region locked filter and most of the videos uploaded on their server is restricted by geographical location and can only be accessed in countries that aren't blocked. Fixing this errors is a bit tricky but yet simple, as the most common method involves using VPN or the popular Hola extension to fake or change your IP address. In as much as this trick works, they can be cumbersome. Hence we're going to show you the best way to watch YouTube videos not available in your country without VPN or extension.

Find Region Restricted YouTube Video URL

To begin with, you'll need to find and copy the URL of the YouTube video you want to watch into a browser. This part only applies to those who are using the official YouTube app. But we'd recommend you to use a third party browser. So open up your Chrome, Firefox or UC browser, login to YouTube and then 'type in' the movie name that you want to watch (which is not available in your region).

access-region-restricted-youtube-videos

Change the Video URL from 'tube' to 'pak'

From here, locate the search bar at the top of the browser and edit the keyword from tube to pak. Then press enter. For example, let's assume the video URL to be..
https://youtube.com/watch?v=watFrxeBNgk
Now erase the keyword tube and change it to pak just like below
https://youpak.com/watch?v=watFrxeBNgk
Note: if you're accessing YouTube with your mobile phone, then make sure to delete the m. For instance if the video URL is
https://m.youtube.com/watch?v=watFrxeBNgk
Delete the m. to make it
https://youpak.com/watch?v=watFrxeBNgk
Once you're done, hit the enter key.

Watch your YouTube Video

From here, you will be redirected to eachvideo.com. This website will automatically hide your location to bypass the geo-restriction error. To be sincere, it's just like VPN but the benefit is that you're not installing any third party app or extension. There's also another method to fix "the uploader has not made this video available in your country". Simply download the YouTube video and watch it offline... case closed!. To do this, add ss before the video URL. For example if the video link is https://youtube.com/watch?v=watFrxeBNgk change it to https://ssyoutube.com/watch?v=watFrxeBNgk that's it!.

Tuesday, 3 October 2017

How To Charge Your Smartphone With Firewood


It's quite exasperating when you decide to go camping​ with your friends and during the road trip, you realised that there is no electricity in your destination. This could make your camping turn sore if you're​ ​been accompanied with your smartphones and camera. But not to be saddened, there's a new innovative "BioLite CampStove" which converts heats emitted from firewoods into electricity to enable you charge your phone while cooking. This way, you wouldn't have to go for camping with your kerosene stove. BioLite CampStove provides a dedicated USB port for charging small electronics and you can set a kettlepot and portable grill on top of it to cook up a wood-wired meal or boiling water.

How it Works

Boilite capmstove works by capturing waste heat from the fire through a heat probe that is attached to the orange powerpack. From here, the heat gets converted into electricity via a thermoelectric generator. This process powers a fan and sends electricity to the USB charging port. The internal fan at this stage injects air back into the burn chamber to improve combustion and ensure a clean and efficient burn. One cool thing about BioLite CampStove is that it came built-in with 2600 mAh battery that charges your device with or without a live fire.


Setup and Use BioLite CampStove

Setting up BioLite CampStove is pretty easy, first you will need to fold the legs out for nested portability. From here, the charging module will hook into place on the side of the honeycomb heat mesh. Now build a pile of twigs, sticks or pellets, (this serves as fuel renewable biomass) and arrange it inside the cylinder. From here, press the power button​ to start/set the fan (into charging unit), then light in a match.


Note that the internal starter battery will help to kick-start the fire before the stove begins generating its own power. And you will have to be careful while dropping in a match, since the cylinder is "deeply narrow" down to the bottom. So be quick, to avoid getting your hands burned. Once the wood caught up, the whirring turbine will fan the smokeless flames. You can now mount your cookware and boil some water or prepare a delicious wood-wired meal while charging your gadgets. If you love this ergonomic​ patented technology (BioLite CampStove), then you'd like to purchase it now for your next camping.

Buy Now: $130


Monday, 25 September 2017

How To Install Google ARCore on Unsupported Android Device


download-google-arcore-for-android

Google have been investing in various apps and services that'll aid developers to build great AR experience on Android. Recently, the tech gaint company released a new SDK called ARCore which was built on the same technology with Tango to "directly" bring augmented reality capabilities on Android. Augmented reality is simply a technology that allows you to put virtual contents to the environment you see with your device's camera. Google termed ARCore as a place to build reality apps on Android and hence the project integrates virtual elements in the real world by using motion tracking, light estimation and environmental understanding.

The sad news, Google ARCore is currently supported with Pixel and Samsung Galaxy S8 device running on Android 7.0 Nougat and above. The company have promised to announce ARCore on 100 million devices before the preview ends, and we'd hope they make good with their promise. Apparently, they'd be working with other Android device manufacturers to make this possible. While it's taking time for Google to officially add support for more device, a nice developer at Github have come up with a way to install and use Google ARCore on unsupported Android device. So if you are eager to test ARCore on your Android device, here is how to install or get it.

Install ARCore Service and Hello AR 

To begin with, you'll need to download and install Google ARCore Service APK. With this ARService, you can run any app that's built on the ARCore platform. So grab the modified version of ARCore Service APK from here and install it on your Android phone. Next up, download and install Hello AR APK from here. This app will allow you to access ARCore on your Android device.

How to Use ARCore on Android

Once you're done installing the aforementioned apps, then it's time to test augmented reality on your phone. To do this, open Hello AR from your device's app drawer, you'll be greeted with a camera interface. Simply point it towards a real environment and ARCore will automatically recognise it. (You'd notice that Google ARCore calculates the area quite fast and accurate). Now tap the screen to add elements.


Saturday, 23 September 2017

How to Convert WhatsApp Voice Notes to Text


WhatsApp is a very popular social media messaging app for smartphones, offering a lot of significant features that allows users to communicate with family and friends. With over one billion monthly active users, WhatsApp brings the functionality to send end-to-end encrypted messages, videos, gif, images, audio files, documents, contacts, user location and most importantly voice notes. The platform also allows for group communication. If you're a WhatsApp user having lots of foreign & local friends, then you may have been receiving tons of voice messages that aren't understandable or you're not just able to decipher or listen to them at that particular time.

What if you can convert those voice notes to text and then listen to them whenever the situation permits you to?. Yeah this is quite possible, as you can comfortably use "transcriber for WhatsApp" to convert WhatsApp voice notes to text without any limit. The app is pretty accurate, and we've personally tested it on Oneplus 3T running on Android 7.0 Nougat and found it to be working quite perfectly. Without further ado, here's​ the perfect method to convert WhatsApp voice messages to text.

Install Transcriber for WhatsApp

To begin with, head over to the Google Play Store and install Transcriber for WhatsApp. There are other similar apps that claim to be able to convert WhatsApp voice notes to text, but Mirko Dimartino's transcriber for WhatsApp is the one that works best and it is the one you should be using.

Choose Language

Once the app is installed on your Android device, locate and open it from your app drawer. From here, you'll be greeted with a brief instructions​ on how to convert your WhatsApp voice notes to text by using the all popular Transcriber. Simply swipe your screen from the right or tap the arrow icon to skip the introductions.


The moment you enter the app's interface, you will​ be allowed to select the current language you're using. To simply put, there are 11 languages supported in transcriber. Under UI, you can configure the options in there to your preference. Once you're done then it's time to convert WhatsApp voice notes to text.

Convert WhatsApp Voice Notes to Text 

Now open your WhatsApp messenger app, tap on a user contact and locate the voice note you wish to convert to text. Next press and hold the voice note, then click on the share icon that's located at the top bar of WhatsApp. From here, choose an action by selecting "transcriber" from the lists. The voice note will automatically start a rapid connection & within seconds, your voice note will be transcribed to text.


You can copy or share the converted voice note to anywhere. Transcriber has no limit as you can be able to convert numerous number of WhatsApp​ voice notes to text without a seconds and everything is quite accurate. There's no annoying ads and it's lightweight. Overall enjoy your converted WhatsApp voice note on Android.


For iOS users, you can install, you can also convert WhatsApp voice notes to text by installing Audio to Text for WhatsApp. Open the app and grant it the permission to access speech recognition. Then open WhatsApp, tap and hold on a voice note, from here, press "forward" and tap the share icon at the bottom right corner of the screen. Next select "Audio to Text" from the list and wait till the voice note is converted to text. That's all!.

Monday, 18 September 2017

How To Download Videos and Music From YouTube

youtube video music downloader

With a community of more than a billion users, YouTube gets more than 100 hours of video uploaded every minute. These videos include music videos, standups, movies, short films, advertisements, branding and lots more. Some content is so good that we watch it again and again, burning our internet data. We keep listening to our favorite music on YouTube in a loop. To sum it up, YouTube is awesome and addictive. But, there's a big dependency. We need to stay connected to the internet all the time if we want to watch our favorite content. Also, every time we watch anything, we consume our internet data. To save data, and watch our favorite content anytime and anywhere, we can download the video or music and then listen or watch it in our favorite player. There are a lot of services and apps to download content from YouTube.

But, the experience with these apps and websites is terrible. First, we have to open YouTube and then copy the link. Then, paste in the app, and then most of the services or apps don't allow the quality download. Downloading YouTube Videos in HD or in mp3 is generally paid in most of the services or apps. Also, having an app just for downloading YouTube Videos is not a good idea. We need a separate player to watch these videos after downloading. Like you, we don't even like all this hassle. So, worry not, we have a solution. We have found a very cool app for downloading youtube videos on our Android Phone. The best part of this app is, it not only supports YouTube but also, you can download your favorite content from SoundCloud, Facebook, Vimeo, Vevo, Instagram, DailyMotion and lots more.

With InsTube - Free Video and Music Downloader, you can download videos in High Quality or directly in mp3 format for free. It is very easy and fast. The app also has private space where you can save your favorite videos or music and lock them, i.e., can be accessed only by entering a 4 digit passcode. So, let's see, how this app works and some more cool features of this app.

How To Download Videos or Music from YouTube

1. Download the InsTube App from here.

2. Open InsTube app and you'll be presented with a screen like shown below.

download youtube videos


3. These are some default bookmarks, you can add your favorite website or app in the bookmark too. Also, there are some more predefined bookmarks available which you can add on this screen. Click the Add (+) icon to add bookmark here. You can choose between a number of websites as shown below.

download youtube videos

4. Now to download video from your favorite site, say, YouTube. Follow these steps:

Method - 1: Download directly from YouTube App
Watching a video on YouTube and want to download it without leaving the app? Simply copy the URL and you'll see a floating widget appear all of a sudden. Click on this widget icon and select your video/audio format to download the video. Alternatively, you can also click on the option given in the notification bar.

youtube video downloader


Method - 2: Download from YouTube bookmark in InsTube App
This method is also very easy and super fast. Simply click on the YouTube Bookmark available on the front screen of InsTube app. This opens YouTube in the custom tab in InsTube app. Search for the video and once you find it, click on the download button available on top right corner.

download youtube videosdownload youtube videos

Method - 3: Download from InsTube Search
When you want to download something but unsure that which site has the video. Simply, use the search available in the InsTube app. It shows the Google search results for the query entered. And, you can open the link you want and download the video. Easy and Fast!


5. You can also check all the downloaded videos and music anytime in the InsTube App in the "Downloads" section and play it directly.

download youtube videos

Private Space (Video Lock)

InsTube has a private space for videos and music to protect your personal privacy. If you want to lock some videos, then you can save them in the private space. And, accessing these videos in future requires a 4-digit passcode.

youtube video downloader  youtube video downloader

So many features and the ease of downloading content from the internet makes this app stand out from the crowd. The app is absolutely free to use and has all the features one can expect in a video and music downloader. So, if you have separate apps for downloading YouTube videos, Facebook videos, Instagram pictures/videos, ditch all those apps and download InsTube App.

Let us know in the comments, what feature of InsTube App you loved the most.

Wednesday, 13 September 2017

How To Get Android Oreo Adaptive Icon On Your Phone

oreo adaptive icon

Android icons have always been a mess and Google are refocusing every efforts to see if they can standardise it. Apparently this isn't the first attempt Google is making in their efforts to achieve icon uniformity. Recalling on last year with Android Nougat , Google urged developers to include rounded icons on their regular icons, and this year's everly solution is Adaptive Icons. Adaptive icons is one of the best new features integrated in Android oreo, it was created with the aim of bringing uniformity to Android main UI. In this way, developers can be able to create a single adaptive app icon which can later be stylised and cut into shapes by any third-party launcher to match your system theme.

This clearly means that instead of having your device's home screen and app drawer being plagued with various icon of different shapes and sizes, everything should now be consistently shaped to achieve uniformity. Unfortunately, only users who have updated their Android device to 8.0 Oreo can enjoy its adaptive icon, in such a way that any app designed for Android 8.0 will adjust to your preferred look while older apps that haven't implemented adaptive icon will be scaled down to fit inside the same background the adaptive icon is using. If your device haven't received the Oreo update yet, then there's a way to get Android O adaptive icon with the latest version of Nova launcher.

Install Nova Launcher Beta

To begin with, make sure that your device is running on Android 5.0 lollipop and above. Then head over to Settings ->> Security and enable installation of apps from "Unknown  Sources". From here, download the latest version of TelsaCoil's Nova launcher beta and install it on your device. Alternatively, you can choose to enroll in Nova Launcher Beta program or if you've the beta version of Nova launcher previously installed, then head to Nova Settings and update the app to its latest version which is v5.5 beta 1 (as of writing this article). Once you're done, set Nova launcher as your default launcher.


Enable Adaptive Icon 

Now simply long press on an empty space on the home screen and tap the gear icon to enter Nova Settings. From here, tap on "look & feel" and you'll see an option named Adaptive Icons. Next simply toggle on the switch to enable Adaptive Icons, and you'll have access to choose adaptive icon shape.


Choose Adaptive Icon Shape

Once you enable Adaptive Icons from Nova launcher's Settings, another option called "Adaptive Icon Shape" will become accessible just below it. Tap on it, and choose the shape you want all your icons to have. Changes will take effect immediately on apps whose developer have implemented adaptive icon. So to make sure all your apps adapts to the new shape, enable the "Mask Legacy Icon' option as this will scale down and place unsupported apps in a white background to match the shape you have choosen previously.


Enjoy Adaptive Icons

Once you're done, head over to the home screen and you'll see that all your apps have taken the same shape you choosed earlier to maintain a uniformed consistent look. That is Android 8.0 Oreo adaptive icon at its full glory. While the last year's circular icon seem to have failed, we'd hope that this one succeed and developers should update apps to support adaptive icons.


Say goodbye to icon packs, that's if you are not a fan. A lot of third party launcher will be throwing their hats into the ring to bring support for adaptive icons, till then you will have to wait (if you're not a Nova launcher fan). We'd hope to see this feature on the pixel launcher too.


Friday, 8 September 2017

How To Install Google Play Store on any Chinese Android Phone


When it comes to buying a smartphone, our choices differs. Some choose to go for the chinese branded smartphones, while others prefer the mainstream brands. If you have recently purchased a good chinese branded Android phone, you'll notice instantly that there's no Google apps pre-installed. We all know that chinese companies offers great specs at a low price, and thus a lot of people will definitely choose to stick with a chinese phone without minding the hassles. For the folks living in China, they'll certainly blend in with their chinese Android phone even without having the Google apps and Play Store. But when you relocate outside of the chinese territory, then you will discover that the aforementioned apps are essential.

The Gionee GN5001S for instance is a top-notch chinese branded Android phone that offers plethora features. The device brings a whopping 3GB RAM and 16GB ROM which can be expanded with 128GB memory card coupled with a 4000mAh li-on battery. If you have recently purchased this device (or any other chinese branded smartphone) and you got faced with the issue of installing Google Play Store, then there is no need to ditch it aside for a mainstream brand. For there is always a workaround to everything in life especially when it comes to Android category. Hence in this article, we're going to unveil and also guide you on the perfect procedure to install Google apps and Play Store on any Chinese Android phone.

Prerequisites

  • Rooted Chinese Android Device
  • Install Root Explorer
  • Install ZArchiver

Root Your Phone

To begin with, you will need to install root access on your Chinese Android phone. This procedure sadly is compulsory and it must be carried out in other to modify & sideload necessary files to the "system memory" on your Android device. Fortunately, we have previously discussed the perfect method to root any Android phone and with this guide, the geeks over at techviola where able to install root access on Gionee GN5001S. All thanks to KingRoot.


Download CHPLAY_5X.7z File & Install Root Explorer

Once you've successfully rooted your phone, the next step is to download the required  files that will give your Chinese Android phone the permissions to allow all the Google apps and Play Store to run on your device. This files once sideloaded into the appropriate "system folder" will automatically install Google Play Services and Play Store on your chinese device. So to get this one going, download the CHPLAY_5X.7z file from above link, followed by root explorer which will come in handy since it auto enables read/write and hence allows you to easily move the files to there specific folder in the system directory.


Install ZArchiver & Copy Files to System Memory


When you're done downloading the file with the name "CHPLAY_5X.7z", install ZArchver and using it to extract the downloaded file to your SD card. Now open root explorer and navigate to the system directory. From here, switch between tabs and locate the file you extracted earlier in your SD card. Open it and you'll be greeted with 5 folders (app, etc, framework, lib, priv_app).


Under "app", copy only the folder named GoogleContactsSyncAdapter and paste it in /system/app. Under "priv_app", copy the folders inside it and paste it in /system/priv_app. For the remaining folders (etc, framework, lib), copy only the files found in there and paste them in their rightful or respective location in the system directory.


  • /System/app/
  • /System/etc/
  • /System/framework/
  • /System/lib/
  • /System/priv_app/

If you are​ prompted to merge, overwrite or replace already existing file, simply tap Yes. Note, apart from the "app" folder, Do not copy the whole folder found inside (etc, framework, lib, and priv_app). Simply open each of the sub folders and at the end, copy and paste only the "files" to their respective locations. When you are done, reboot your phone.


Enjoy Google Play Store

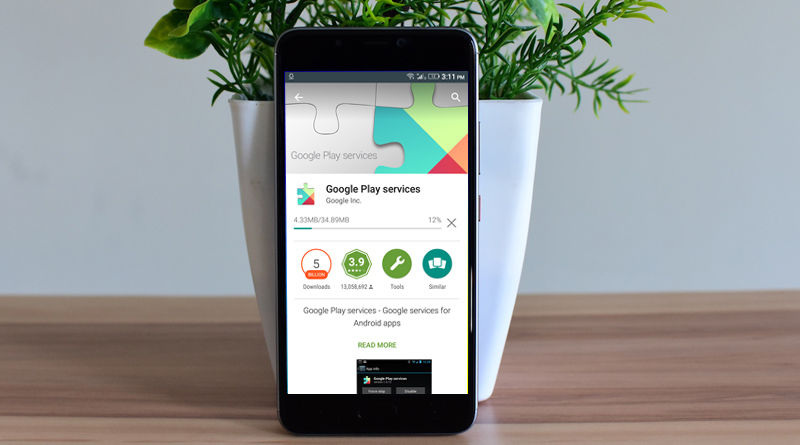
Once your device is back on, you will notice that Google Play Store has been installed successfully. Simply open it and sign up. From here, download all the Google apps including Gmail, YouTube, Google map, Google+, Google drive and even Google photo. You can go further to update the Google Play Services to its latest version which will enable apps such as Snapchat and Google Play Games to work perfectly.


Wrapping Up

With this procedure, you can install Google Play Store and other Google apps on your Chinese Android phone without any hassle. I have tested this method on a friend's Gionee GN5001S and it worked perfectly. Hence it'll work on other Chinese Android phone provided you follow the instructions correctly. If you encounter any difficulty or if it worked for you, kindly use the comment box below to share your experience.