Friday, 21 July 2017

How To Install Xposed Framework On Android 7.0 Nougat


Finally, the long awaited xposed framework for Android 7.0 Nougat has arrived. Rovo89 the developer behind the Xposed framework once stated that there was still a lot of work to be done in other to add compatibility for Nougat. Due to this reason, a lot of Android users who are running on Nougat have sort after for a way to get the xposed framework working on their device, but all efforts so far seems to prove abortive. The good news however is that the team behind PurifyOS has managed to get their hands on abforce's modular art of the original xposed installer, and after modifying it, they where able to port an unofficial xposed framework that can be installed via twrp recovery through a flashable zip. If you're rooted and you have not heard of xposed framework before, then i guess you've been living under a rock. The xposed framework once hooked into your Android device, gives you the opportunity to customize your phone to the fullest with the aid of modules that can be grabbed within the xposed installer app. Now if your device is running on Nougat, and you wish to have xposed framework installed in it, then here's how to get started.

Note that in some cases, your device may not boot after installing xposed. So ensure you've a recent NANDROID backup that can be restored incase you are faced with a bootlooped or soft bricked​ device. Remember that techviola won't be held responsible if you brick your device during this process.

Prerequisites

  • A Rooted Android device running on Nougat
  • Custom Recovery such as Twrp recovery must be Installed
  • Unknown Source Enabled

Install Xposed Installer 

To begin with, make sure you have enabled installation from Unknown Source on your device. To do this, head over to Settings and then Security. From here, simply toggle ON the option. Then download and install the xposed Installer apk from here. Don't open it yet i.e if necessary, since it'll be used to install and manage modules.

Download Xposed Framework Flashable Zip

Next, you'll need to download the flashable zip file of xposed framework. But before we dive into this, you should know that xposed framework has 3 different versions designed for a specific CPU architecture. To see the kind of processor your device have (i.e ARM, ARM64, or x86) simply download CPU-Z. Once you've figured out your device's CPU architecture, download Xposed framework zip from here.

Install Xposed Framework.zip through Twrp Recovery

Now reboot your device to twrp recovery or any custom recovery that you already have. From here, make sure you've a NANDroid backup on standby, then if you're using twrp recovery, simply tap the "Install" button and navigate through your device's folder. Then locate and select the xposed framework zip file you downloaded earlier on, and swipe the slider at the bottom of the screen to flash the xposed framework.zip file. Once you are done, ensure to "Wipe Cache/Dalvik", then reboot your phone.

Enjoy Xposed Framework On Android Nougat.

Once your​Android device is back on, simply open the xposed installer app, and you will notice that the xposed framework has been installed successfully. To test things out, go to the Download section in xposed Installer app, then search for any module you wish to install. Download and install it on your device, then enable it via the Module section in xposed installer app and perform a soft reboot afterwards.


That's it. Also keep in mind that a few number of modules needs to be updated to support Android Nougat. Although there are dozens that are already compatible. If perhaps you get a message saying that "xposed is not(yet) compatible with Android SDK version 25 or your processor architecture”, simply ignore this, as it'll still work.

Thursday, 20 July 2017

How To Get MacBook Pro Touch Bar Feature On Android


Android has always been an open source operating system and a targeted point for aspiring developers. Even though we have seen a lot of customizations been introduced everyday, borrowing one or two things from iOS wouldn't hinder its performance in any way. Following the release of Apple's 2016 MacBook Pro, the company introduced a Touch Bar feature which gives MacBook users an intuitive shortcuts and controls over apps. With the touch bar integrated on Android, it'd give you an immediate access to a quick range of toggles.

The good news however is that an XDA developer (alecot18) has come up with an app that can bring MacBook Pro like touch bar feature on Android. The developer, once stated that TouchBar for Android was actually inspired by the original touch bar for iOS. Installing touch bar on iOS device will require jailbreak, but you can enable touch bar on Android with or without rooting. So to get this one going, here's how to get Mac-like touch bar feature on Android.

Note that we tested TouchBar on Samsung Galaxy S5 running on Android 6.0 marshmallow and everything went fine. So if your Android device is running on 5.0 lollipop and above, then you're go to ride.

Install TouchBar For Android

The elegant and yet powerful bar that gives you access to quick controls is dubbed Touch Bar. So to begin with, head over to XDA labs and download touchbar for Android. Before you install the touchbar app, make sure you have enabled​ "Unknown Source" from your device's​ settings. To do this, go to Settings -> Security and tick to enable the option.

TouchBar download

Grant Permissions

Once you are done installing the app, locate and open it from your device's app drawer. On the initial launch, you will be presented with a simple user interface, with "Special Access" that needs to be granted before the activation of the app . So to get this one over and done with, tick to enable these 3 options; Overlay Screen, Write System Settings and Do not Disturb Access. Under "TouchBar Settings", toggle ON the option "Activate TouchBar". Then swipe up from the bottom of your device's screen just about the navigation bar, and you will see touchbar in action.


Enjoy Mac-like TouchBar​ On Android

As we said earlier on, TouchBar offers quick control to handy options such as WiFi, ring mode, bluetooth, auto rotation, music level and even brightness. The app also unveils a Google search icon, which opens Google app when long clicked. There is also a text field that allows for quick search and also music controls​. You can also add a shortcut on the home screen to quickly start touchbar. You can even choose the "handle height" and you can even select your preferred music player between stock music app or spotify.


If you want to hide touchbar, simply swipe down from the handle, and there's also an Auto hide option in the app's Settings that helps to control the delay time in which this operation takes place. Overall TouchBar is a very handy app that offers essential features and it's lightly customizable. The developer has promised to improve the settings in the nearest future, and this will include more functions for a better experience.


Tuesday, 18 July 2017

XNSPY: An Advanced Spyware For iPhone Without Jailbreak

Ever wondered what your partner does on his smartphone or where he goes when you are not around? Have you ever pondered why your significant other arrives so late from work? Well, these are some common concerns that most of us face at some stage of our lives. Though no one wants to believe the person they love could be cheating on them, however, if you have your doubts it’s better to do something about them rather sitting idle. We hate to be the bearer of bad news, but an early detection can save your heart and health a lot of trouble. Using an advanced spyware for iPhone without jailbreak like XNSPY can help you decipher truth and lies. Here we have reviewed this smartphone monitoring app, so you can gauge how it can be of any assistance to you.

How Does It Work?

The cell phone monitoring software can be secretly installed on your other half’s mobile phone without having to grab it physically. Thanks to the no-jailbreak version of the app you can remotely setup the program by logging into XNSPY’s online system and adding target’s Apple ID. You will get to see virtually everything your partner does on his smartphone – from iMessage chats to GPS coordinates – the surveillance app is an excellent spying tool that collects and uploads data in 100% stealth mode without giving the target a hint about its presence.

What Does It Cost?

XNSPY comes in two different packages: Basic Edition and Premium Edition. The Basic Package has all the entry level features such as call logs, SMSs, WhatsApp and Viber photos, calendar entries, and so on. Plus, few additional features like viewing multimedia files, location history, internet history, and other alerts. You can do all this for as low as $8.33 a month since annual subscription plan of Basic Edition will cost you $99.99 per annum.

On the other hand, the top of the line Premium Edition has it all. You will get everything that isn’t offered to Basic Edition users. This includes some of the most advanced features such as tracking chats on instant messaging apps, Viber and Skype Calls, watch list alerts, and much more. It’s an excellent package to enjoy optimal tracking at your convenience. The twelve-monthly subscription for the package will cost you $12.49 a month and you will be billed $149.99 for a year.

List of Features

Here is a list of XNSPY’s innovative features you will find on its Premium Edition:
  • Seamlessly captures all the incoming and outgoing call logs. You can even configure phone calls from specified numbers.
  • Let’s you secretly monitor your loved one’s location history. So you can identify where he goes and who he meets.
  • Spy on the different social media apps such as Instagram, Tinder, etc.
  • View the content of all text messages along with the exact time and date stamps.
  • Access to incoming and outgoing emails on the target iPhone without having to jailbreak it.
  • View the list of all the stock and third-party applications installed on the device.
  • Snoop on the audio and video files stored on the device to sniff out something fishy.
  • The ability to access target’s internet browsing history also enables users to detect suspicious activities such as renting a room at a hotel through its website or using an online service to send a bouquet.
  • Go through the contact list to identify names or contacts you have no knowledge of. If the numbers won’t add up, his story probably won’t either.
  • Constitute trigger words, phrases, and contact numbers to get instant notifications.
  • Get views of the all the calendar entries on the target device and stay ahead of the curve.      
Aside from this, you can view the data even if the target deletes it from his device. This is because the data is uploaded to your XNSPY control panel at regular intervals. Essentially, you are looking at the screenshots of the information that is extracted from the target device. So, it doesn’t matter if your partner deletes his records from the phone.

Professional Customer Support


While the official website looks professional, the company has also received some terrific complements from its customers. Depicting the 24/7 live chat support and complaint email system of the company has touched euphoric echelons. Both existing and potential customers can connect with the support team at any hour of the day to get prompt reply to their queries. For indirect support, XNSPY's website has a dedicated FAQs section. Furthermore, you can also find live demo of the app on the website.

The Good Stuff

  • It helps users track the most relevant data and provide up-to-the-minute information.
  • The app doesn’t proffer any features that can spoil user experience such as functionality that allow users to take pictures from the camera on the target device often causes a lag. 
  • It supports more iOS versions than most of the apps.
  • The tracking software proffers basic and premium features, so users could choose a plan that best suits their monitoring needs as well as budgeting.
  • You won’t get a Basic Edition that offers so many features and functions in such a price.
  • Since it has a no-jailbreak version therefore, you don’t have to jailbreak an iPhone or iPad.
  • This spyware for iPhone without jailbreak is ranked among the best programs in its niche by Top10Reviews.

The Bad Stuff

  • It doesn’t support Blackberry and Symbian phones.
  • it doesn’t allow users to take snaps from the camera on the target iPhone.

Verdict

Clearly, the app has more pros than cons. This puts it among the list of most reliable monitoring solutions that are available today.

6 Best Movie Streaming Apps For Android and PC (2017 Update)


There’s quite a wealth of good video streaming apps on the internet. These apps can let you watch movies and TV shows on your couch, and they’ve helped many cut costs of paying for cable TV as well as going to movie theaters to watch the same content only once for every ticket while munching on expensive popcorn. Get an app from this list, and you can turn on your favorite TV show or movie whenever you want. Some even let you download the movies and other content to watch offline later. Let’s begin.

1. Tubi TV


Tubi TV is available on the Google Play Store, and it is available for free. Tubi TV is really the best app out there for someone looking for a no-nonsense and no-frill app that gets them their favorite content to watch without rocking the boat too much. The content is fully legal. The ads you watch help pay for the rights of the content the app hosts. Tubi TV helps you keep up to date with the latest episodes of TV shows as well as the movies that release each week. The app is light, easy to use and organised.

2. Snag Films

snagfilms

People who love cinema that is artsy, breaks the mould and furnishes content that is refreshing and inspiring will fall in love with Snagfilms. The app has movies and TV shows along with documentaries and short films, all covering a motley of issues and scenarios, as well as a myriad of characters and plotlines. You can watch unknown movies with celebrated artists in them, as well as LGBT cinema, black movies and documentaries of rock stars, among other things. The app is dedicated in its approach and you will not find a single insipid trope-laden movie in its library. Despite its lack of generic, blindly commercially produced cinema, Snag Films makes sure you’re never bored. Food for the mind as well as the soul.

3. ShowBox


ShowBox is an app that has been made popular by its reputation of being a free app. Like most free apps, you must watch ads in the middle to help pay for the content and help the developer. There is content in multiple genres, resolutions and even languages. The app also lets you access subtitles and you can download movies through torrent. The app has fought off tough competition in its genre against apps that have now gone defunct. Showbox apk also has some amazing forums on platforms like Reddit that can serve as user guides as well as troubleshoot help.

4. Netflix


Netflix makes things easier for a lot of people. There are fewer ads and sponsored content. The speed and resolution can be easily controlled. The service is subscription only, but you can access it from around the world through any device by merely logging into the website through a web browser, if not through the app. The app is most well known for its original content like Orange is the New Black or Arrow, Flash and other amazing shows that have won their share of nominations and awards through the years. They are really a treat to enjoy. In fact, these original shows are frequently pirated to other apps. Miss it not!

5. Crackle


Crackle is sort of like Netflix, only it is yellower and more chilled out. Netflix can come off as being too much to take in at once. Crackle has a more relaxed approach, with its original content being more laid back and diverse than Netflix. The app is available for virtually all devices as well. In fact, Netflix and Crackle compete fiercely in the market. For this list though, they both qualify.

6. Hotstar


People fond of Bollywood content, Indian TV shows and movies and other fun stuff can find it on Hotstar. The content they have is a distillation of the best stuff Indian TV has to offer. They also broadcast cricket tournaments for those interested, right through the app.

Wrapping Up

There’s other good apps you can try too, like the recently released Amazon Prime Video service that lets Amazon Prime users watch great movies and TV shows for free, while also getting them faster delivery and early access to limited time offers. How are these movie streaming apps in your opinion? I’d love to know which ones you love the most in the comments below.

Friday, 14 July 2017

How To Create Animated Cartoons With Google Toontastic 3D


Believe it or not, we're in an era where tools and devices can give kids the opportunity to explore, imagine, create and even have fun with technology. Google over the years has been working on numerous projects that'll help kids to create and share their own ideas through imaginative play. Having acquired the children's "Launchpad Toys", Google has released a new storytelling app dubbed Toontastic 3D, which is available for free on Android and iOS. Toontastic 3D is a playful storytelling app that empowers kids to create their own animated cartoons, the app was first unveiled in 2D version for iOS, but Google has decided to offer kids the opportunity to create their own imagination in 3D. So if you're a parent, and you want to teach your kids the steps to create animated cartoons with toontastic 3D, then here's how to get started.

Install Toontastic 3D

To begin with, head over to the Google Play Store or iTunes Store, then install Toontastic 3D. Once you have installed the app on your Android or iOS, open it and you'll be greeted with some cool animations. The app's main interface introduces an "Idea Lab" feature which showcases lovely cartoons created by other kids. The bottom left corner of the app unveils a 'Settings' button, which allows you to enable option between a simple character only or a full motion to both character legs, and arms.

toontastic 3d featured image

Create a Short Story

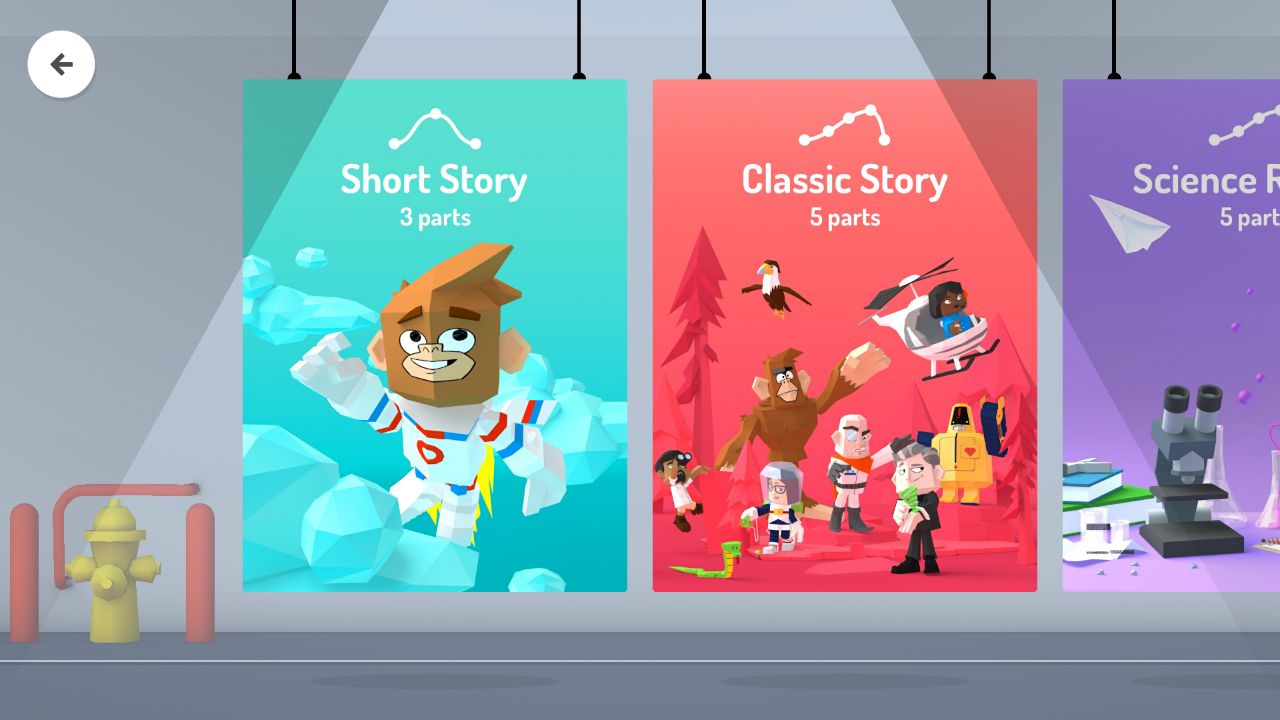
From Google toontastic 3D home page, tap on the big "+" button in the center of the app to start creating a new story. From here you'll be presented with an option to create 3 types of animated stories. These options are known as story arc whereby you can choose to create a short story with 3 parts, classic story with 5 parts, and a science report with 5 parts. For this article, we are going ahead with the short story option.

toontastic 3d featured image

 Choose a Story Structure

Once you select the short story option, you'll be required to build an outline for the story you want to create. The standard structures include templates for the beginning, middle, and end. Where the 'beginning' is where you introduce the characters and the setting of your story, & the middle is where something happens, like a problem. Whereas the end is where your story wraps up. If you want to add or remove a template, simply tap on the "+" button at the bottom.

toontastic 3d featured image

Select a 3D Animated Background

The moment you decide which structure you want your story to carry, you'll be presented with some lovely and multiple 3D animated backgrounds to choose from. You can select either the background that suits your story or choose to create your own 3D animated background by tapping on the "Draw Your Own" button. We, geeks, over here at tech viola aren't good in drawing, so we're going to make use of the already pre-defined 3D animated background.

toontastic 3d

Pick a Character

Once you've selected a background, the next step is to pick a character for your story. Similar to the background, toontastic 3D offers a huge number of already pre-defined 3D characters you can choose from, but you can choose to show off your creative skills by drawing your own character. To do this, simply tap on the "Draw Your Own" button.

toontastic 3d featured image

Then you will be presented with a drawing board, from here toontastic 3D app will offer various tools such as brush, color palette, eraser and fill color option and this you can use to draw your character. (As usual, we're not skilled in drawing, so I'd prefer editing a pre-defined character for my story). When you're done drawing your character, choose the amount of depth to create the 3D effect. Then give your character a name on the next page.

toontastic 3d featured image

As we said earlier, we aren't good at going gaga and drawing our own character. So I'd prefer editing a pre-defined character. To do this, select a character for your story, then tap the edit button on the character's icon. From here, you'll be able to customize your character, simply select a color and tap on the body part you wish to be colored. Once you're done, choose your edited pre-defined characters and start your story.

toontastic 3d featured image

Record Your Story

From the next page, you will be able to place your predefined and custom characters on the background or storyboard. Then tap on the "Start" button and drag to re-arrange the character the way you want them to appear in your story (this will be recorded as a video). You can also tap on a character to record the animation assigned to it. Note that only pre-defined characters can be animated and not custom characters. At this point, a background sound will be recorded from your device speaker, so make sure you're in a good and no noisy environment.


Set the Mood and Export 

Once you're done recording your story in a video format, the next page will unveil an option to set the mood of the recorded background sound. Toontastic 3D app offers various sound themes ranging from sad to bold, and there's a volume level for each type of sound mood. Once you're done with everything, give a name to your animated cartoon story video, and you're done with toontastic 3D. Note that you can also edit a part of the story, then export the video and enjoy.

toontastic 3d featured image

Teaching With Toontastic 3D

As you can see, we have been able to make a cartoon scene with toontastic 3D. The app is quite easy to understand and doesn't require special knowledge. Although Google claims that toontastic 3D is especially great for kids aged 6-12 years, you can also try the app and see what it has to offer. It's time to allow your kids to map out a story plot, simply use this guide to them on how to master Google toontastic 3d app.

Tuesday, 11 July 2017

MoveIt Review: Transfer Media Files To SD Card On Android


Downloading media files from the internet is something everyone loves to do, despite the fact that our storage memory may not be sufficient enough to house all the medias. If your phone is filled with Images, Videos and Audios, Which have to be transferred to SD Card, Transferring them to SD Card may be an hectic process as we've to search each and every folder and then transfer or delete the files separately. The good news however is that you can easily transfer your Images, videos and Audios to SD Card using moveIt. MoveIt is a app that helps to transfer your Images, Videos and Audios  to SD Card and Vice Versa easily, as all the Medias are organised together and also data wise so you do not have to search each and every folder. The app brings smart features and it's quite reliable.

Key Features

  • Transfer Media from internal storage to SD Card - Easily and efficiently transfer your Images, videos and audios altogether to SD Card using MoveIt.
  • Transfer Media from sd card to internal storage - Also you can easily transfer your Images,videos and audios altogether to Internal Storage.
  • Auto Transfer – A Unique and one of its Kind Feature which lets you Transfer your Medias to SD Card automatically. You don't even have to open the app.
  • Cleaner – MoveIt has a Inbuilt cleaner which clean your phone’s junk files such as Apk,Temp files,Empty folders etc to boost your phone’s speed and also to increase the storage space.

  • Media Scanner – With MoveIt’s Internal and External storage Media Scanner, find all your hidden Media in your phone which are not being displayed.
  • Search– Easily Search for your Medias in Internal Storage or in SD Card by simply entering their name or the name of the folder in which they are present.
  • Media Player – Easily select your Media as MoveIt lets you Enlarge your Images, Play your Videos and Audios while selecting them.
  • Delete – Not only MoveIt lets your Transfer your Media but it also lets you Delete your Media Easily as all the Medias are organised together and also sorted out Date Wise .
  • Media Manager – MoveIt also serves as Media Manager as It not only lets you Transfer your Medias but also lets you easily View and Delete them.

Conclusion

What's different about MoveIt is that it lets you transfer your Medias with ease and efficiency. All your Media are sorted out Date wise and organised together so you need not go to each and every folder searching your medias and then transfer or delete them. If your Android device is low on Storage then MoveIt is a must have app which you should download. The size of the app is less than 5 MB so you don’t even have to worry about MoveIt occupying your Storage space.

Sunday, 9 July 2017

How To Solve Math Problems With Your Android Camera


Mathematics right from the very beginning have always been a compulsory subject, it is an essential component of any school and also an important driver of innovation in our technology world. A lot of students who are weak in maths have always sort for an easy way to tackle or solve some common maths problems, but all efforts so far seems to prove abortive. Imagine you are a 23 year old college student, and you have been given a difficult math exercise to submit the next day, there is a chance that you are likely to run out of ideas on how to solve the given math problem.
Also Read: How To Control Your Android With Your Face Or Head.
But what if you can open an app on your phone, position your camera towards a textbook​, scan a picture of the math problem and have the result presented to you with detailed step-by-step instructions​ on how the equation was solved. This techniques is quite possible, if only you are able to discover the perfect app that can magically solve math problems using the camera on your Android device. Without further ado, here's how to use the world's smartest camera calculator to solve math problems with ease.

Install Photomath 

To begin with, head over to the Google Play Store and install Microblink's Photomath Camera Calculator app. The app is built on real-time machine vision technology, and i must say... It's a super concept, considering the fact that it allows you to solve millions of math problems instantly while allowing you to learn and master mathematics with tips and tricks.


Solve Math Problems

Once you open the app, you will be greeted with an instruction on how to use the app to solve math problems. Simply tap on the next arrow or swipe through to skip the steps. Then tap "Done" to enter the app's camera section. From here, get a math textbook or a piece of paper containing the math problem you which to solve. Then point your camera towards the intended math problem,  photomath will automatically scan and show the result with step by step instructions on how the equation was solved.


Drag to expand the rectangular shape in the middle of the screen to enable photomath in scanning more math problems, but do this with caution, as the app will try to take other numbers around the equation into calculation, thereby giving you a wrong answer. Before now, photomath deals with printed letters only, but the app can now recognise your messy handwriting. There's a flashlight​ icon located at the upper right corner of the screen, you can turn it on during the night to enable photomath in scanning math problem.


Once you tap on the result, photomath will provide a step by step instructions on how a simple math problem was solved. The app also brings a smart calculator that allows you to edit math problems with ease. This is one of the cool feature i love in photomath, as the auto scanning can sometimes seem to be annoying. Photomath brings supports for 20 languages and it can solve math various problems such as equations, inequalities, integration and many more.


Final Words

Having discovered photomath, I've come to acknowledge it as been one of the best and most essential educational app on Android. The only downside of the app is its inability to enable users to capture or take a picture of an exact equation or intended problems. We'd hope this feature will been added in the app's next update. Overall, photomath camera calculator can help you to learn and solve math problems easily.

Sunday, 2 July 2017

9 Best Android O Features You Can Get Right Now


When the developer preview of Android O got released, a lot of users where happy, for every Android update brings new features. Android 8.0 is the next iteration of Android, even though Google has not given it a name yet. But my best bet is Oreo since the name sounds cool enough. If you are a pixel device owner and you've successfully installed the developer preview of Android O, then you'd notice a revamped phone that offers new and handy features. Android O developer preview brings a new look, although some of these features won't make it to the final build. Before we proceed any further, below are what's new in Android O.
  • Snooze Notification
  • Picture in Picture Mode
  • Adaptive Icons
  • Custom Lock Screen Shortcuts
  • Inverted Theme
  • Smart Text Selection
  • Revamped Emojis
  • and much more.
If you've been eager to taste or feel some of the Android O features on your smartphone, then it can be achieved with little effort. The only minimum requirement is an Android device running on 5.0 lollipop, although you can try some of these procedures on KitKat. Getting some of the Android O features will require root access, so make sure that your device is rooted. Now if you are ready to get all the Android O features on your Android device, here's how to get started.

1. Stock Wallpaper

Google have always been passionate enough to integrate a set of new default wallpapers​in every Android release. The Google Pixels when released offered a lot of beautiful and elegant default wallpapers that ranges from natural scene to cityscapes. Android O was not an exception since it offers a fully HD wallpaper of a satellite-based image. With these wallpaper, livening up your Android device will be made easy. So if you want to experience how stunning Android O default wallpaper is, then you can download it from here.

Android O wallpaper

2. Revamped Emoji

Emojis are superb, they have these beautiful euphoria that astonishes its users. Android nougat when released back in 2016 brought some cool circular emojis that's more lively and bold compared to the blob shaped emoji that Google integrated in Jellybean, KitKat and lollipop device. The new circular faced emojis mimics that of iOS, with more classic design. Android O offers a bunch of new and improved circular emojis, and they're more beautiful than ever. If you want to taste the Android O emoji on your device, then you'll need to be on lollipop and root access will be needed. The whole process involves using the magisk module or a flashable zip to get Android O emojis on your phone.
get Android O emoji

Using the magisk module method, download NotoColorEmojiReplacer.zip then open the magisk manager app (if installed) and head over to the "Module" section. From here tap on the + button and choose the downloaded zip then install it. Reboot your device and it is done. Next, if you do not have the magisk manager app installed on your device, then you can use the flashable zip method since it is more easier. So to begin with, download the flashable NotoColorEmojiReplacer.zip, then reboot your device into recovery mode. From here choose "Install", then locate the downloaded zip and flash it. Reboot your​ phone and check the revamped Android O emoji through your keyboard app.

3. Snooze Notification

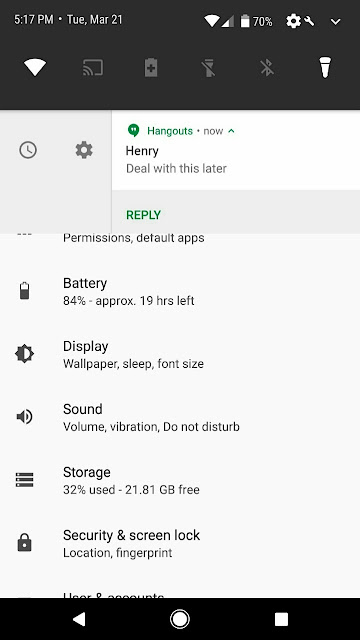
One of the flamboyant feature Android O unveiled was a snooze notification. The overall idea of integrating this feature is to dismiss notifications for the time being, and these notifications will pop up later after a time interval. Snooze notification comes in handy let's say when you are busy typing a text on your phone and a notification pops in, you can easily choose to deal with the notification later. As an Android user, you'd know that notifications comes and go, so it is recommended to save it for later instead of allowing them to clutter on your device's​ notification panel.

get snooze Notification on Android

After much research, i was able to find two apps that conveniently brought Android O snooze notification on my lollipop device. Even though they aren't an exact replicate of the snooze Notification found in Android O, but they mimicked it perfectly. The first app is boomerang notification, it allows you to save individual notification and set a reminder to access all of them later. When you install boomerang, you can dismiss a notification by swiping left. Another unobtrusive notification will appear in its place for a short time, allowing you to save it for later. The second app is Notif log Notification, once installed open it and turn ON the Floatie bar. Then you can be able snooze notifications from the panel.

4. Adaptive Icons / Launcher

A close look at the newly released Android O suggests that it's using the pixel launcher and the pixel rounded icon packs. The two apps combined together gave Android O a befitting look and feel. Now the good news is that an XDA developer (linuxct) have successfully ported or perhaps extracted the pixel launcher from Android O, but it's only available on device running Android 6.0 marshmallow and above.

Android O launcher

To get Android O pixel launcher on your device, simply download and install it from here.  Since the Android O pixel launcher is only supporrted on device running 6.0.1 marshmallow device, you can however use Nova Launcher to make your device look & feel like pixel launcher once coupled with the appropriate pixel icon pack. To get this one going, head over to this procedure and see how to set up Nova launcher to mimic pixel launcher.

5. Picture in Picture Mode

Picture-in-Picture mode is one of the most popular feature every Android users have always wished to have. Fortunately, users where able to figure out and enable the PiP mode in Android O through the system UI. The picture in picture mode integrated in Android O is one of the handy feature we're hoping for Google to maintain in the final build, as it helps in multitasking.

Android O picture in picture mode

Imagine a situation where you're watching YouTube videos​ and being able to minimize to your device's​ home screen. This will automatically show a pop-up window that floats on other applications, you can drag the rectangular pop up window to any corner of your screen while chatting. So to get Android O picture in picture mode on your device, simply head over to the Google play store and download float tube video player.

6. Custom Navigation Bar

Android O developer preview when released brought a unique feature known as Custom Navigation bar. It's one of my most loved featured considering the fact that it allows you to add extra custom buttons to your device's existing navigation bar. When you add buttons such as volume adjustment, clipboard and keyboard switcher, it helps you to perform tasks more faster. We have previously written a guide on how to add extra buttons to your existing navigation bar on Android nougat, you can check it out here. moreover this doesn't require rooting. For Android 4.2 and above, you can try the pixel navigation bar app since it brings pixel Navbar to your phone.

Android O custom navigation bar

7. Notification Dots

We're all familiar with Notification badges, there main function is to pullout unread counts from supported apps. Google have decided to join the trend thereby integrating a Notification badge in form of 'dots' in their Android O developer preview. If you're used to using the numeric or dynamic badge, then i suggest you try the exclusive Android O notification dots and see how natural and lovely it looks.

Android O Notification dots

To begin with, head over to the Google Play Store, then scroll down and tap yes I'm in to become a beta tester. Then install the beta version of Nova Launcher or you can buy the prime version ($4.99) to unlock all features. After installing the app, go to Nova Settings then scroll down and click on "Notification Badges". From here, tap on the drop down arrow beside "Choose a style". Then select "Dots" and set the position and size to your preference.

Android O Notification dots

8. Custom Lock Screen Shortcut

If you've been observant enough, then you must have noticed two pre-defined shortcuts (camera and emergency phone) on your Android device's​ lock screen that cannot be changed. This is quite disappointing, but the recent release of Android O developer preview gives you the opportunity to choose apps which you would like to open from your device's​ lock screen. To get the custom lock screen shortcut as seen in Android O, you'll need to use a third party app.

Android O custom lock screen shortcut

So head over to the Google Play Store and install Next Lock Screen. Once you open the app, it'll automatically take you to its lock screen. From here, swipe up from the bottom of the screen and tap on "Pick a Shortcut". Next lock screen allows you to select up to 10 apps you can use as Custom shortcuts. So once you're done selecting the app, tap "Done" and you'll have apps available to be accessed from your device's lock screen.

9.  Android O Theme

Finally, we have the Android O theme.When you install the developer preview of Android O for the first time, the first thing you will notice is a subtle dark gray text on an all-white background. This is quite awesome and I'd hope you love it. Now to get the exact replicate of Android O white background theme, we'll have to use subtranum theme engine to achieve this. So to begin with, install substranum theme engine and open the app. From here, go to the theme section and search for Android O theme which costs $1 only. Once found, install it by following our previous tutorial.

Android O theme

Android O Matters

Every Android updates brings cool features, but Android O offers a lot of them. While we are still expecting​ Google to name and release the final build of Android O, we'd hope they don't get rid of these already seen features as it'll be a total disappointed. Overall enjoy all the Android O features on your device.