Monday, 27 February 2017

How To Theme Stock Android With Substranum Theme Engine


The best way to Theme Stock Android using Substratum Theme Engine which completely revamp the look and feel of your device.

Customization has always been one of the greatest features of Android. If you're a tinkerer just like me, you'd know how important it is to revamp the look and feel of your device at least once in a while. The CyanogenMod custom ROMs where Integreted with a powerful theme engine "CM theme engine" which has the capability to revamp your device, however since CyanogenMod is dead this feature isn't to be expected on the new Lineage OS ROMs since the developers might come up with something more robust and better. Apart from the CM theme engine, you can take advantage of the "Substratum Theme Engine" to theme your Stock Android without the need for a custom ROM.

What is Substratum?

Substratum is an app, that utilizes all of Sony's Overlay Manager Service (OMS), found on the official AOSP code review. This is similar to "Layers" in terms of stability and customization as it runs off an upgraded version of the Resource Runtime Overlay system, with the added benefit of running up-to-date Sony code on a customized ROM.


Substratum which was formerly known as "Layers" activates a hidden theme engine in Stock Android running on 6.0 marshmallow and above, and this let you change the look and feel of almost any app or element. So if you've been using other layers on your Marshmallow or Nougat device, then Subtranum is worth revisiting. As usual you'll need to be rooted in other to enable Substranum to apply overlay themes on your Stock Android. Also you need to be running on Android 6.0 or higher. In addition to that, Substratum will probably not work on manufacturer-skinned versions of Android, so for best results, you'll need to be running Stock Android or an AOSP-based custom ROM.

Install Substratum Theme Engine

To begin with, head over to the Google Play Store and install Substranum Theme Engine. It's a Free app, so you don't need to pay a dime. Now from your app drawer locate and open Substratum, then grant the app root access. Next tap "Allow" if Subtranum prompts you with further permissions.

Install a Theme

Next you'll need to install a Substranum theme. So once you're on the app main interface, tap on the three-dot menu button in the top-right corner of the substranum app, then select "Play Store Themes". Alternatively you can as well search for a theme on the Google Play Store by typing in "Substranum Themes". From here you'll be listed with all of the Substratum-compatible themes on the Play Store, so browse through these and find at least one that suits your tastes and then install it.

Apply Your Theme

Now once you've installed any of your preferred Substratum theme, head back to the main Substratum app, then pull down to refresh. From here, select the theme you want to apply. Then toggle the switch to select all overlays included in the theme at once or you can manually select each overlay if you don’t want to theme all the elements or apps. Once you're selected the elements you'd like to theme, tap the floating action button in the bottom-right corner, then choose "Install Selected". If your Stock Android has support for Substratum, then all overlays will be applied without a reboot. But if not, then the app will ask you to reboot your phone to apply selected overlays. Simply tap "OK" from the pop-up and wait till the rebooting process is done then enjoy the new look.


Revert to Stock Android Theme

The Substranum Theme Engine is no doubt powerful, but at times we'd like to revert every tinkering we've apply on our stock Android. Thus if perhaps you want to go back or revert to the original stock Android Theme of your device, then Substranum has an option that will help you on that. To get this one going, locate and open "Substratum Theme Engine" from your app drawer, then tap on the hamburger menu situated on top-left corner of the Substranum main interface. Now select the "Defaults Manager" option and then tap on "Restore System Theme". Simply reboot your device if you're prompted and that's it.


Apply Font Pack With Substranum Theme Engine

One of the spontaneous robust features Substranum Theme Engine unravels with it is none other than the ability to apply or change Font packs. This option has been one of the features i love about the Substranum app and i guess a ton of dudes are with me on this one. Thus here's the perfect procedure to apply Font packs using Substranum Theme Engine. First download a Substratum Themes which has fonts included in theme. Example we’ll be using the Mono/Art Substratum Theme since it contains a reasonable amount of fonts.


Now open the Substratum Theme Engine app from your device app drawer & then choose SubFont Theme. Select any one of the font packs you would like in that theme, After selecting your preferred font, tap on the tick mark. A new window will appear and asking you to allow or deny substratum to modify system settings. Simply allow Substratum to modify system settings. Then head back and press the tick mark again. The toast message "Font pack is processing" should appear here followed by a soft SystemUI reboot which will apply your selected Font pack.

Saturday, 25 February 2017

How To Convert a Smartphone Charger Into a Wireless Charger


This is actually how to convert a smartphone charger to a wireless charger. I never thought of how possible it is to make a wireless charger using cheap and affordable materials not until now that the trick has gone viral. Imagine how great and honourable it will be to make a homemade wireless charger that can charge your smartphone even at 50 ft away from the power source. Without wasting much time, let's take down the list of items required for the conversion, anyway the items are what we use everyday and are very cheap to afford.
  1. Smartphone Charger Adapter


  1. U.S.B Cable


  1. A Bar Magnet ( with definite shape and not broken)


  1. Aluminum Foil


  1. Electric tape


  1. Copper wire


  1. Scissors


Brief Procedures Of How You Can Successfully Convert Your Smartphone Charger to a Wireless Charger


1. Pick up your U.S.B cable, cut it nearly at both ends, use the same scissor to carve out part of the insulated cover of both wires as shown below.


2. Cut out a piece of the Aluminum foil and use it to cover the naked parts of both wires gotten from procedure 1, as shown below.


3. Now tie some strings of copper wire round both USB ports.

4. On the same region, cover the part with your electric cable and repeat procedure 3

5. Pick up your bar magnet and place it on the top left side of your adaptor for proper wireless connection.

6. Now connect both USB ports to their respective device and plug the adapter to a power source and watch your phone charging. That's it!!.

How To Install Google Pixel UI On Xiaomi Redmi Note 3


The Xiaomi Redmi Note 3 Android was one of the best phone suitable for the low end. The device brings the ever known MIUI operating system which is still regarded as the best. Even to this fact, we can't possibly deny the beauty and smoothness of a "Stock Android". When it comes to comparing the MIUI with the Stock UI, I'd say that the "Stock UI "wins in the game. No bloatware, No fancy animations, just everything about the Stock Android has been coded clean with exceptional design. Google didn't make any difference with the Pixels interface, they single-handedly customized the "Pixel UI" with a ton of features such as the Launcher, Google Assistant, Rounded Icon Packs, Wallpapers and Animations.


Now if you've ever wanted to convert or turn your Redmi Note 3 Pro (Snapdragon Variant) into the Google Pixels UI, then you're probably one step ahead. As usual a developer "Mgeranimus" at XDA forum has built a "flashable" zip that can bring all the Pixels features directly on your Redmi Note 3 Pro. While this may seem intriguing, you've to be rooted and your Redmi Note 3 must be running on the latest Lineage 14.1 OS custom ROM. To get this one going, make sure you've the below "Prerequisites".

Requirements

  • Make sure to unlock the Bootloader of your Redmi Note 3
  • Make sure TWRP Recovery is Installed on your Redmi Note 3
  • You might lose your files, so backup all your data such as apps, contacts, messages and chats. 
  • Make sure your battery is charged upto 70% to avoid random shutdowns during the flashing process.

Download Package

  • Pixelized UI Mod v05 : Download here.
  • Lineage 14.1 OS ROM : Download here.
  • ADD-on SU Enabler : Download here.
  • Google Pixel GAPPS (7.1 ARM64) : Download here.

Optional Downloads

  • Add-on Back To Stock MIUI Boot Logo : Download here.
  • Add-on White Pixel Boot logo + Bootanimation : Download here.
  • Add-on Blue Status Bar Better Than Pixel : Download here.

Installation Guides

  • To begin with, download all the required files from the above link. Next use a USB cable to transfer the downloaded files from your computer to your Redmi Note 3 Pro smartphone. Make sure they're been placed in the internal or SD card memory. Just choose a directory that you can remember easily.
  • Now switch off your Redmi Note 3 Pro and reboot into TWRP recovery mode by pressing and holding the Power and Volume down button at the same time for a few moment. Next you'll need to perform a complete wipe, thus make sure you've taken a NANDROID backup of the current ROM.
  • From the TWRP recovery mode, select the "Wipe" option followed by "Advance Wipe". Now tick all the options in this area except the micro SD and USB OTG option. Once you're through with this one,  simply Swipe to Wipe. Then return to the TWRP main menu.
  • From here, select the "Install" option, then locate the Lineage OS zip file you downloaded earlier on, then swipe to begin installation. Once the process is completed, you can then flash the official "Add-on SU enabler". Flashing the SU zip file enables root access on the Lineage OS firmware.
  • Once you're through with this one, you'll need to flash the Google "Gapps" which will automatically install the Play Store and Google Play Services.  Simply locate the Gapps file from the directory you placed it earlier on, then swipe to install.
  • Next you'll need to flash the "Pixelized UI Mod v05" zip file, this will transform your Redmi Note 3 Pro to Google Pixel device, thus you'll get the Pixel features such as Launcher, rounded icon, theme, wallpapers, Google Assistant etc. To flash this zip, hit the "Install" option from the TWRP main menu, then locate the "Pixel UI Mod v05"zip file and swipe to install.
  • Now we're already through! If perhaps you want the Google Pixel boot logo and animation then you can download and flash the files to your preference. Note that this step is "optional". Once you're through with flashing all the necessary zip file, simply wipe dalvik cache and reboot your Redmi Note 3 Pro device.
  • The first boot process might take a few minutes, once your device is back on track, complete the initial setup and remember to select English Language from United States because this will get the Google Assistant to work properly. The "OK Google" also works fine.

Final Words

I must commend that this mod actually provided everything i craved for. Having flashed this zip on my buddy Redmi Note 3 Pro device, it automatically enabled every bit of the Google Pixel features. There's no need to manually install the Pixel apps to transform your device to Pixel-like. One great thing i love about the mod is probably the new notification panel and status bar followed by the Pixel solid navigation buttons. Overall it's worth giving a try if you're already a tinkerer!

Friday, 24 February 2017

6 Most Beautiful HD Wallpapers Collection For Android


Let it shine! Wallpapers are the best way to beautify our Android phones. They've a great way of livening up our device to look stunning more than ever. When was the last time you changed your Android default wallpaper? I guess you've already forgotten. Apart from icon packs, a cool HD wallpaper can actually go a long way in customizing, beautifying and livening up your Android phone or tablets. The past few weeks has been very stressful for us, since we decided to spend a fair amount of time hunting down high quality Android wallpapers which have supports for both portrait and landscape mode.

Finding the best Android wallpapers to use as background on your device home screen can actually seem a bit difficult, especially if you're looking for a catchy wallpaper that is as rich in color and sharp as in high definition images. The Google Play Store offers tons of apps that have wallpapers, but it’s difficult to find truly high quality wallpapers there. Thus upon discovering the Google+ collection feature, we decided to curate some of the amazing collection of HD wallpapers for Android. This wallpapers are frequently updated and you can obtain high quality wallpapers by following a few collections or communities. Below are the best FREE HD wallpapers for your smartphone or tablet that you won’t find in pretty much any application.

1. Absolutely Wallpapers ™.


Absolutely Wallpapers™ brings the best and the most beautiful collection of HD wallpapers for Android.  Also referred to as "Google Earth View", the community is been managed by varieties of people's from different categories of life. Unlike it's predecessor, Absolutely wallpapers brings a ton of cool landscape wallpapers designed specifically for Android tablets. Most of there beautiful HD wallpapers collection includes the nature scenes and cityscapes. In summary Absolutely Wallpapers brings the most awesome HD wallpapers collection to liven up your tablet.

2. Android Wallpapers Collection.


Android Wallpapers is one of the new and hottest wallpaper community on Google+ where you can painlessly grab most of the finest or your favourite Android wallpapers.Android wallpaper community brings a high definition of the most beautiful wallpapers to liven up your home screen. The community features a variety of HD wallpapers which have supports both on landscape and portrait mode. Thus they're most suitable for smartphones and tablets. Android wallpapers community brings different types of wallpapers such as nature scenes, abstract and other HD wallpapers that suits your device.

3. PinSharp Wallpapers Collection.


PinSharp Wallpapers Collection is one of my favorites Google plus wallpaper community. Their sole purpose is to bring unique and high quality wallpapers directly on your Android home screen. The community brings new and beautiful HD wallpapers everyday. Most of their wallpapers collection includes abstract, flowers, nature scene and other amazing HD wallpapers which are supported in portrait mode. Overall PinSharp Wallpapers community are dedicated to bring the most beautiful HD wallpapers to liven up your Android home screen.

4. World Of Wallpapers Collection.


World of Wallpapers Collection by Cliff Wade features the most beautiful HD wallpapers in portrait mode and thus it supports android phones. If perhaps you need a stunning wallpaper that can best Liven Up your device home screen, then this probably can be the best alternative. Having amassed a great number of the most stunning Android HD wallpapers, Cliff Wade has dedicated himself into sharing HD wallpapers of any kind exclusively on his Google plus collection or community. Most of Cliff Wade designed wallpapers includes cityscapes, nature scene and other amazing wallpapers.

5. Absolutely Wallpapers Collection.


Nick Nice has single-handedly dedicated himself into making amazing wallpapers for Android. The Absolutely Wallpapers Collection curated by Nick Nice features a ton of portrait wallpapers designed specifically for Android smartphones. Most of Nick Nice works are incredibly beautiful and can liven up your phone. The wallpapers designed by Nick Nice generally includes tech stuff, cityscapes, nature scenes, cars, super hero & comic stuffs. Overall his wallpapers includes assortment of HD quality wallpapers that can fit in any device.

6. Material Wallpapers Collection.


Material design, they're probably one of the finest wallpapers that catches my fancy. They've a unique way of livening up your Android device home screen to look classic and elegant at the same time. Material Wallpapers by "Alex Chaves" is a great collection if you want a flat and yet a classic material design style of Wallpapers. His Google plus wallpaper collections features a ton of healthy and the most beautiful HD wallpapers with a mixture of muted, scrollable, colourful and wide range of portrait and landscape material design wallpapers. Most of his wallpapers works great on Android phones and tablets.

Other Google+ Wallpapers Collection

  • Awesome Backgrounds Collection
  • Background Collections
  • WallMob Wallpapers & Backgrounds
  • Google Earth Wallpapers Collection
  • Land Of Wallpaper Collections
  • Minimalist Wallpaper Collections
  • Phone Wallpaper Collections
  • Academy Wallpaper Collections
  • Buildings, Nature and Landscapes
  • Mobile Art and Abstract Collections

Final Words

The above HD wallpapers are the best from our list, these beautiful wallpapers comes from different categories such as landscapes, cityscapes, space, abstract, and smatterings of animals, cars, and people. However if you want to obtain beautiful wallpapers from the Google+ feed, then download the Google+ app and open it. From the search bar type in “Wallpapers” to see the results, then identify a few communities that offers stunning HD wallpapers and "Follow" them. Now every time you open the Google+ app, you will find fresh HD wallpaper to download from your feed.

Tuesday, 21 February 2017

How To Install Android 8.0 Oreo Concept Boot Animation On Your Phone


The potential Android 8.0 rumors has even reached the ears of tech enthusiasts. In our previous article, i pinpointed the possible Android 8.0 "O" names, it's expected features and release date. Off all the "Possible Names" we've mentioned thus so far, the name "Oreo" seems to be the captain among all. Even developers are favouring it, Google so far haven't made or release any information concerning the upcoming Android 8.0. However, while we're still waiting for the Android 8.0 news, a developer at the XDA forum decided to take matters upon himself and thus he envisioned and built a "Concept" boot animation which he concludedly termed "Android 8.0 Oreo bootanimation".
Also Read: How To Install Google Pixels Boot Animation On Any Android Device.
The name seems perfect and moreover the concept boot animation was running superb on my device, I couldn't believe how the developer single-handedly crafted an animation that's stunning, seeing his imaginary work in action, you'll certainly come to agree with me that the boot animation best represent the name "Oreo". Without saying much, if perhaps you're a tech freak who loves tinkering with his/her android phone, then below is a guide to download and install the pontential Android 8.0  Oreo concept boot animation on your Android device.

Requirements

Android 8.0 Oreo Boot Animation

Installation Guide

To begin with, download the supported Android Oreo concept boot animation .Zip file from the link given above. Note choose the file that best correspond with your device screen resolution, in other for the boot animation to "Center" well on your android display. Next place the bootanimation.zip file on your SD card or internal memory without extracting it.

Now locate and open your favourite file manager, then grant it root access. (For Es File Explorer, swipe from left and enable root explorer). From here head over to the /system/media folder on your root partition. Then long-press on the existing bootanimation.zip file located there, select "Rename" from the context menu. Now add a ".bak" or any other preferred name to it as shown in below screenshot.


Next up, navigate back to your root-enabled file manager main menu, now locate the folder where you placed the downloaded bootanimation.zip. From here, long-press on the file then select "Copy." After that, head back to the /system/media folder, then paste the new file in this location. We're almost through here, so sit tight and continue reading...


Now once you're through with the above procedure, we'll need to grant the .zip file permissions. To get this one going, long-press on the recently-copied bootanimation.zip file, then select "Permissions" from the context menu. Now make sure you set the permissions to "Read/Write/Execute" while all other permissions are set to just "Read". The below screenshot detailed everything.


Once you're through, simply reboot your Android phone and now you'll be greeted with the new Android 8.0 Oreo concept bootanimation. The concept looks nice and moreover it works perfectly on Moto G4 plus and any other android phone. If you encounter any issue while installing the Android 8.0 Oreo concept boot animation, then simply notify us with the comment box below.

Android 8.0 Possible Names, Release Date & Expected Features


Android O is the next version of Android operating system that'll be announced by Google probably in 2017. Google's annual Android updates are known to bring new plethora features and the names are followed by Google's standard alphabetical Android naming convention. We've seen the Android 7.0 Nougat performance capabilities and perhaps it's time to move on with the newest potential Android 8.0. Google are working hard to build the next variation for android smartphones and tablets which will come with advance features.


Currently, there isn't much information to be known about the Android 8.0 "O", and the rumors circulating around so far is that Google might not even announce another version of Android OS this year since they've recently released the new Android 7.1.2 Nougat update on Pixel and Nexus device which is still in beta testing state and the official update will soon be rolling out in a matter of months on supported device. Now while this rumors may seem a bit overwhelming, Google might clear the phase and announce the unexpected since we still have a long way to go this year.

Android 8.0 Possible Names

As we've discussed earlier on, Android naming convention are followed by the English alphabetical order. Thus the Android 8.0 name will probably start with the letter "O". In the year 2016, i could remember vividly that Google opened the android naming process to the public for the Android "N" and while majority of tech enthusiasts prefer the name "Nutella", Google decided to go for "Nougat". This case might even be the same with the Android "O". Without any further ado, below are the possible name for the potential Android 8.0. Note we're making an educated guesses that'll aligh with the letter "O".

Android Oreo


Oreo is a sandwich cookie consisting of two chocolate wafers with a sweet creme filling in between. This delicious cookie (Oreo) has become the best-selling cookie in the United States since its introduction. Thus considering how "Yummy" the name sounds, there's a high tendency that Google might choose it as the name of the potential Android 8.0 "Oreo".

Android Ovaltine


Ovaltine suddenly pops out of my mind! During the course of writing this article. Perhaps it's because i have come to love the delicacy of chocolate milk powder carrying 3 flavors such as "chocolate malt, rich chocolate and sugar". Ovaltine is a brand of milk flavoring product made with malt extract sugar and whey. Some of of it's flavors also have cocoa and the name sounds pretty perfect for the potential Android 8.0 "Ovaltine".

Android Oatmeal


Oatmeal is another possible name that's suitable for the potential Android 8.0, the name sounds cool and standard. Oatmeal is a made of hulled oat grains and groats  that have either been ground, steel-cut, or rolled. The "ground oats" are also called "white oats" and the "steel-cut oats" are known as "coarse oatmeal" or "Irish oatmeal" or "pinhead oats". While the "rolled oats" can be either thick or thin, and may be "old-fashioned" or "quick" or "instant".

Android Ontbijtkoek


Google might even think of the name "ontbijtkoek". Ontbijtkoek is a Dutch spiced cake mixed with "Rye" (its most important ingredient which colors the cake in light brown). It is often spiced with cloves, cinnamon, ginger, succade and nutmeg. Ontbijtkoek is traditionally served at breakfast with a thick layer of butter on top, as a replacement for bread. However, due to its sweet taste it is also served as a snack. Considering the name and the chocolate mixed flavour, Google might even decide to call Android 8.0 "Ontbijtkoek".

Other Names

  • Android Orange
  • Android Ornate
  • Android O'Neil
  • Android Orchestra
  • Android Olive
  • Android Orchard
The above mentioned Android 8.0 possible names where speculated by our teams, we've seen how "Google" usually use the "Chocolate" word to name its annual android version. Thus we decided to mention the perfect names that best suits and align with the upcoming android version. Google might even come up with a name that's completely different from what we've seen above. However the name "Oreo" seems to be the captain among all and tech enthusiasts are already voting for it.

Expected Features

The Potential Android 8.0 features has not been known, even while the rumors are circulating, Google haven't made any attempt to unveil the features. However an indian-based designer envisioned and decided to create a concept design for the upcoming Android 8.0. Concepts are fun and interesting as well, we've seen tons of smartphones concept images around the internet and this doesn't make a difference. Now if you take a glimpse at the image below, you'll see the Android 8.0 design envisioned by "Vijay". The concept didn't really step away from the Android N, but rather shows the possible advanced features we're to expect.


From the concept images above, the on-screen navbar circle home button has been replaced with the letter "G" and this wouldn't be a surprise considering the redesign launcher Google unraveled on their Pixel smartphones. The lock screen has also been replaced with a brand new customizable design, you can customize the notification app which you want to see at the lock screen.


The Dock icon on the home screen, has also been changed in such a way that once you "slide left" or tap the "G" centered icon on the Nav bar you'll be taken to your app drawer where you can access all your apps. The concept image also unravels the notification panel which has somewhat been redesigned. Now at the status bar, you'll notice that notifications has been centered rather than been stacked on the left side. This feature looks pretty cool and we hope Google takes it into consideration.


Apart from this all, the concept image also brings a "Live Call Notification Alert" which allows you to interact with Call Alert. Also the app drawer display has also been improved. We're also not to neglect the newly redesigned keyboard from the concept above. This makes it possible to interact with search screen. Thus you can find apps by using your thumb for one hand interface. Overall this certainly is a nice concept and we sincerely hope for Google to consider it and even add more features.

Monday, 20 February 2017

How To Enable Picture in Picture Mode On Your iPhone


The iOS 9 Picture in Picture multitasking was one of the finest features integrated in iPads. We've seen numerous features the iPads unravels which wasn't enabled on the iPhones. Apple considered the larger screen on the iPads to that of the iPhones since there rationale could probably revolve around the fact that iPhones medium screen can't utilize this essential features. However from my own perspective, there's a high tendency that the iPhones can run this features without any hassle. The iPhone 6 and iPhones 7 for instance brought with it a premium specifications that is capable of running any app or games, so why would there be bugs, lags or issue if the Picture in Picture mode is integrated in it?.
Also Read: How To Enable Split View & Slide Over Multitasking On iPhone.
Earlier in one of our previous articles, i highlighted the 3 multitasking features integrated in the iPads (Slide Over, Split Screen and Picture in Picture mode). We thus went further to unravel the perfect methods to get this features on iPhones except for the Picture in Picture mode. The iPads Picture in Picture feature allows you to watch videos in a small thumbnail or pop-up window over other apps whilst you perform other functions simultaneously on your iDevice. Seen the important of this feature, we've figured out a way to enable the iPads Picture in Picture multitasking feature on your jailbroken iPhone.

Note: This procedure requires you to have Cydia app and a Jailbroken iPhone, so if you haven’t jailbroken your iPhone, headover to Google and quickly look for a guide on that.

Install ForceInPicture

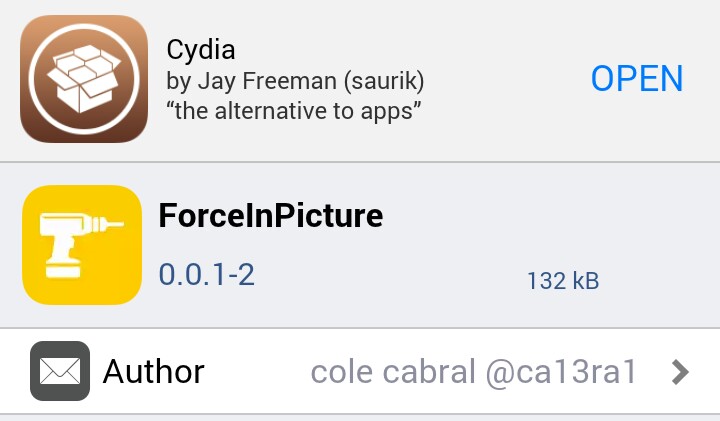
ForceInPicture is a cydia application that "programmatically" enable Picture in Picture feature on unsupported and jailbroken iOS devices. The app is very simple to use and there's no options to configure. Thus to begin with, open cydia app on your iPhone, and search for "ForceInPicture" (without quotes) in the search tab. Next tap the “Install” button followed by the “Confirm“ icon. Now hit “Restart SpringBoard” if prompted to complete the installation process.


How To Use Picture in Picture Mode On iPhone

As stated earlier on, ForceInPicture does not require any knowledge nor special configurations. Thus once you install the app then you're completely good to ride. Simply open a video and you will notice a dedicated button of the tweak. Tap on that button and then tap on the home button and the video that you where playing will show as an overlay at the bottom of the screen. You can reposition the overlay by dragging it with one finger. The overlay has three buttons for the Pause, Close or Return to full size function.


The ForceInPicture tweak is compatible with the default Apple video player so, it will work with the video app and Safari but it certainly won’t work with apps like YouTube, Vimeo and Dailymotion etc. If you want to watch the videos of these apps as an overlay then you can open the same videos in the Safari and then make it as an overlay and enjoy them. Another alternative to enable ForceInPicture tweak on the YouTube app is to install "PipTube", which acts as a YouTube player with the added benefit of allowing for Picture in Picture mode.


Overall the iPads Picture in Picture mode feature comes in handy especially when you want to perform certain tasks on your iDevice. Once you've installed the ForceInPicture tweak and enabled the picture in Picture Mode on your iPhone, you can now painlessly minimize the supported videos and continue watching them while multitasking on your iPhone.


Sunday, 19 February 2017

Nokia 6 Android Phone Unboxing and Hands On Images


We've seen the Nokia's Android device unveiling silently in 2017. HDM Global are seriously breathing new life to wake up the Legends. Our expectations have thus been fulfilled and many Nokia fans or enthusiasts are eager to see the newly launched Nokia 6 in reality. Earlier on, (back in January to be precise) HDM Global released the Nokia 6 android phone in China and the sells has been tremendous so far. The newly launched Nokia 6 android device uphelds to it's premium specifications and features just like we unraveled earlier in one of our previous articles.


We've seen numerous concept images or perhaps renders of the Nokia 6 android phone. Now here's a cool hands-on images and Unboxing of the Nokia 6 android phone with it's elegant design and the top-notch features unraveled by the mid-range smartphone. The hands-on images looks somewhat familiar with what we've probably seen in the past. The initial Unboxing of the Nokia 6 android device unveils a regular reflex, Earphones, Micro USB Cable (type C), and a travel Adapter. Those are rather the only accessories the flagship device has in store.


Now coming back to the Nokia 6 android device itself, the sound made during the device boot process brought back the old memories we had back then when the Nokia 808 and it's predecessors where still active. The Nokia 6 android device features a unibody metal design cased in aluminium. The device weighs a 170 grams and the fused antenna band design is slightly visible at the edge of the device.


Now taking a closer glimpse at the top-front of the Nokia 6 android phone, we've got the notification and LED sensors, a earpiece port that doubles as the speaker, an 8 megapixel front camera and the Nokia branding. Apart from this, the Nokia 6 android featuresa 5.5 inches display with full HD resolution and incredible colour reproduction wrapped in 2.5D Gorilla Glass. The display stack is laminated together with a polarizer layer enabling excellent sunlight readability and slim form.


The Nokia 6 unveils a back buttons and a unique home key which capacity doubles as a fingerprint scanner. On the back, we've got a 16 megapixel phase detection auto focus rear camera which is suitable for taking sharp detailed pictures. The Nokia also unravels an LED flash, a secondary microphone and the Nokia branding. The  Nokia 6 f/2.0 aperture lenses and exclusive camera UI with automatic scene detection make it easy to take great shots every time.


The Nokia 6 android phone unveils a 3.5mm headphone jack at the top. At the right side, we can see the power button and the volume up/down key. The micro USB port, primary microphone and the speaker are located at the bottom of the Nokia 6. To the left, we've got a hybrid tray where you can insert either your mini or micro SD card. The Nokia 6 android phone is definitely a premium device that brings plethora features.


The Nokia 6 is completed with the latest generation Qualcomm Snapdragon 430 processor with X6 LTE modem designed for excellent battery life and superior graphics performance. The device brings an adreno 505 GPU, a processor speed of 1.4 GHz and it also feature a dual SIM and 3000mAh non-removable battery. The Nokia 6 runs on the latest version of android 7.0 Nougat with Nokia own custom UI which is based on CyanogenMod 14.


The Nokia 6 has 4GB RAM and 64GB storage with which to run the latest version of android Nougat and is packed with entertainment to bring to life the latest that android has to offer. The dual amplifiers deliver a 6dB louder sound than a regular amp, giving higher voice, deeper bass and unmatched clarity. Dolby Atmos creates powerful, moving audio that seems to flow all around users.


Launcher

The Nokia 6 android phone brings with it a completely new launcher that seems a bit unique. On the device first boot, you probably won't get an app drawer on the launcher since it's running on stock android. However the app drawer thing can be enabled once you navigate to the launcher Settings>Preference. Then tap the "Layer Mode Settings" options and from there enable "Two Layers".


The Nokia 6 android phone also brings the Nougat split screen features which enables you to run multiple apps side by side on the phones display. This is totally awesome considering the level of multitasking the split screen mode brings. The Nokia 6 android phone camera is definitely perfect for outdoors shooting as it catches pictures with full HD resolution.


Final Words

So that's it with the Nokia 6 Unboxing and hands-on images. We've seen so far the device premium features and it's worth budgeting for. The HDM Global are seriously on a high peak to launch good numbers of Nokia brand phones this year and so many consumers are eagerly anticipating for this. The Nokia 6 will soon be made available on other countries apart from China. Till then!...

Image credits: C4ETech