Wednesday, 31 May 2017

LG V30 Renders Featuring a Slide-out Secondary Display


These LG V30 mock-up renders looks completely overhauled​, as the slide-out secondary display could come in handy for multitasking purposes.


LG V30 is the third flagship from the LG V-series smartphones and we're hoping to see something quite different. According to the unofficial preliminary specifications for the LG V30, the upcoming flagship device will feature a whopping 6GB RAM and 128GB of internal storage coupled with 6.2 inches display and a dual front and back cameras. The flagship will be powered by Snapdragon 835 and we are to expect a makeover ticker notification. As usual, renders are beginning to surface online and a lot of these envisioned mockups reveals an LG V30 that features a slide-out secondary display.

Comparing the Nokia 808 with the current device we're using now, you'd agree with me that there isn't much difference in design, except for the Galaxy S8 and LG V20 that brought cool rounded display corners. Now imagine a super slim LG V30 featuring a slide-out secondary display (not keyboard, but a fully-fledged display). The device will be quite unique and perhaps interesting (that's if the renders are true). The notable leaker Evan Blass recently shared stunning render of the LG V30 on his twitter timeline, and a close look at this renders suggests an LG V30 with a slide-out secondary display. Below are his tweets and the mock-up renders for LG V30 as shared by Evan Blass. Seeing is believing i guess!.

LG V30 is also known as Project Joan, Evan Blass went further to share the "LG V30" renders with its secondary display fully extended. Now looking at the renders above, you will notice that the slide-out secondary screen will be fully interactive, as it is been designed to easily call-out other apps while performing various tasks on the primary display. A usuage scenerio was shared also to explain how the slide-out secondary display works. The above LG V30 renders looks completely overhauled and they remind me of blackberry priv that was released back in 2015. The case is now different because the BlackBerry Priv featured a slide-out keyboard and LG V30 could feature a Slide-out display. So will you buy an LG V30 that brings the design as shown above?.

Tuesday, 30 May 2017

How To Get iOS 9.3 Night Shift Mode On Android


Enable night mode on your Android device to relieve eyestrain. Any iPhone or iPad running iOS 9.3 features a night shift mode for healthy circadian rhythm.


Following the release of iOS 9.3, Apple had to integrate a smart feature known as night shift mode which regulates or reduces the blue light on your idevice for a healthy and sound night reading. Now if your iPhone or iPad is running on iOS 9.3, then you can as well enable the night shift mode via Settings >> Display & Brightness, then toggle ON the "Night Shift" option. Now the overall idea of bringing a night shift mode on iOS 9.3 is to relieve eyestrain and make your eyes feel at ease during night readings​. The night shift  mode in iOS 9.3 comes quite in handy when you're having trouble sleeping at night after hours spent in watching your phone screen.

To recall, the developer preview build of Android 7.0 Nougat featured a Night Mode which reduces the blue light on your phone by adjusting the screen to natural color. The concept was great, quite similar to f.lux for desktop computer. However this feature did not make it to the final build of Android 7.0 Nougat and that was disappointing. Now if you are an Android user who wishes to get the iOS 9.3 night shift mode, then it's quite possible and we've a workaround that does not require rooting. So to get this one going, below are the two cozy apps that can bring iOS 9.3 night shift mode on your Android device.

1. Twilight

Twilight is arguably one of the most popular​ Android app that brings iOS 9.3 night shift mode on your device. Twilight functionality is quite smooth, as it filters the blue light that emits from your device after sunset and protect your eyes with a soft pleasant filter. To begin with, head over to the Google Play Store and install Twilight. Once you open the app, you will be greeted with an intro explaining how blue lights produced from LCD screens distorts your circadian rhythm. Swipe to read through this or you can skip the tutorial by tapping "Close". Getting into the app, you'll discover a pretty fair options to tinker with. Now you'll need to carry out this process yourself, however i' ll be explaining some of the features twilight brings. The color temperature, intensity and screen dim are the essential aspects you will need to configure properly.

Twilight

Drag the slide to and fro to adjust the screen dimming, this'll help to reduce light emission. Becareful not to over drag the intensity to avoid making your phone screen look rusty. The filter time helps your device screen to adapt on sun cycle, so whenever the sunset approaches, your screen blue light emission will reduce gradually to protect your eye. Twilight also unveils "More Settings" where you can configure other options such as the backlight control and enable the app to auto start when your phone boots on. Reading at night is more pleasant with twilight, as this will relieve eyestrain and ensure a peaceful sleep. To enable the bed reading in twilight, tap on the app menu, then scroll down and enable this feature which is located under profile. Once enabled, your screen backlight will be lowered far below the ability of the backlight controls on your screen. Once you're done setting things up, tap the floating icon to activate night mode.

2. Blue Light Filter - Night Mode

Blue Light Filter is the best alternative for twilight, as it brings special features. The app reduces the blue light on your Android device by adjusting the screen to natural color and this'll improve sleeping time and make your eyes feel at ease during night reading. To get this one going, head over to the Google Play Store and install blue light filter. Open the app and swipe left to skip the introduction. Now tap the lone "power button" situated below the screen to dive into the app main menu. By default blue filter will get into action immediately, so if the default settings doesn't please you, then you can as well change them to your liking. Blue light filter brings a lot of handy features, and you'll surely love the experience.

blue light filter

Final Words

Enabling night mode on your Android device can help to relieve your eyes strain and save your device battery. Blue lights can cause a great harm to your eyes, it poses a threat to your retaina neuron and prevents you from sleeping peacefully. If you cannot wait to see 'night mode' integrated in Android system UI, then the above apps will gladly enable it for you. Do note that once you've activated a night shift mode on your Android device, the "Install" button won't be functional until you pause the night mode.


Sunday, 28 May 2017

Get Android O Navbar Customization Feature on your Android Nougat


Use custom navigation bar to add extra custom buttons to the Navbar on your Android device without rooting.

customize the navbar on your Android Nougat

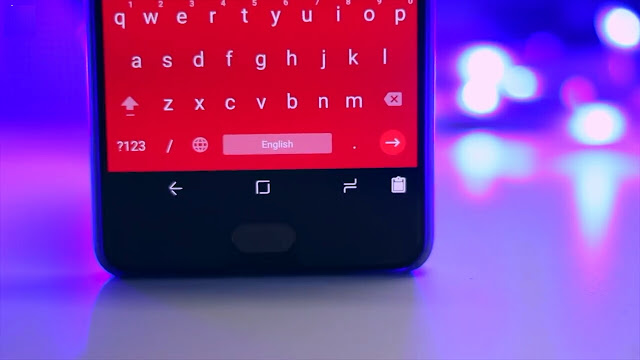
Android O is the next iteration of Android device, prior to the developer preview that was released earlier on, users who were able to install Android O developer preview on their Pixel or Nexus device saw a lot of smart features integrated into the upcoming Android version. Under the system UI tuner of  Android O lies a navigation bar customizer, which allows you to add extra custom buttons to the left and right of your existing on-screen navigation bar. This buttons when triggered will be able to call-out your keyboard, camera etc (depending on the type of buttons you chose). Now if you cannot wait for Android O, you can at least customize your navigation bar using custom navigation bar.
Also Read: Modify Your Device's Navigation Bar To Have Solid Buttons Like Pixels [No Root].
A custom navigation bar is your answer for bringing the exclusive Android O navigation bar customization feature on your Android nougat device, and this comes without root access. The app does not work on Touchwiz, Resurrection remix or any other device that uses dirty unicorns smartbar, however, if you are running on Android 7.1, LineageOS or even O preview, then you're in luck. Another cool feature of the custom navigation bar is that it'll bring Galaxy S8 and Pixel navigation bar on your current device without rooting. We'll get into this later. Now without further ado, here's how to customize your navigation bar on Android Nougat without rooting.

Install Custom Navigation Bar

To begin with, head over to the Google Play Store and install custom navigation bar. If your device isn't compatible with the app, then don't bother sideloading it because it'll not work in any way. Once you have the app installed, open it and tap on "Get Started" to skip the introduction. Now you'll be greeted with the procedure on how to give the app permission in other to modify your Navbar. If you've root access, simply press next and allow superuser access to automatically grant the permission. But let's assume you don't have root access, then you can grant the required permission with a simple ADB command.

Custom navigation bar

Enable USB Debugging and Connect Your Device to Your PC

Next, you will need to connect your device to your PC with a USB cable. Then head over to Settings >> About Phone >> Build Number and tap this 7 times. Developer options will be created on your device Settings menu so head back to "Settings" and jump into the developer options. From here, simply toggle ON USB debugging.

usb debugging Android Nougat

Install and Run ADB 

Now download ADB Installer and install it on your PC (administrator privilege will be required). Make sure you've enabled USB debugging and your device connected to your PC, then launch the terminal or CMD on your Windows and type the below command then hit enter.
adb shell 
Now type the following command and hit the Enter key again.
pm grant xyz.paphonb.systemuituner android.permission.WRITE_SECURE_SETTINGS
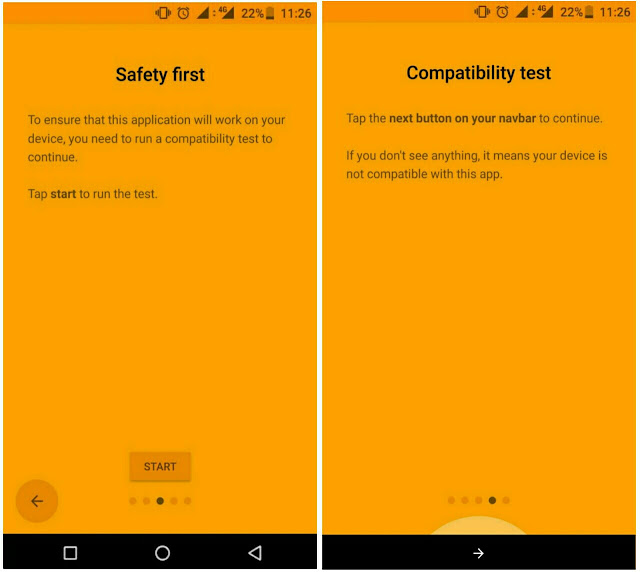
Once you've done this, the yellow screen in custom navigation bar will automatically turn "green" and this shows that you have successfully granted the app its required permission. Now tap next and the app will require you to run a compatibility test to check whether your device is supported. Simply click the Start button to get this one going, if everything goes well, hit the next arrow and tap "Finish"  to jump to the app settings menu.

custom navigation bar

Add Custom Buttons to your existing Nav bar

Once you are done with the setup process, you will be taken to custom navigation bar 'Settings' menu where all the tinkering and customizations will begin. Now to add extra custom buttons to your existing navbar, go Navigation bar under Settings and scroll all the way down till you see the "Extra right" and "Extra left" button option. From here, simply choose the type of button you want and you're good to ride.

add extra Custom Buttons to the navbar on your Android device

Set Custom Navigation Bar to Look Like Galaxy S8 or Pixel XL

Now I'll be demonstrating the best method to customize your navigation bar to look exactly like Galaxy S8 navbar without rooting. You can also make your device nav bar to mimic the pixel nav bar and this will only require you to download the image file for the pixel navbar icons. To get this one going, download Galaxy S8 nav bar icons, then open custom navigation bar and tap on the 'Navigation bar' option under Settings. From here, tap on "Experimental tweaks" then tap on "Type" under “Back“ and select “Keycode“. Next under “Back“, simply tap on “Keycode“ and select “Back“. Now tap on "Icon" and scroll all the way down till you see "Browse file". Tap on the option, then select the downloaded image for the Back key and tap ok.

get Galaxy S8 navbar with custom navigation bar

Now repeat the above process for each of the navbar key and select the appropriate images. Remember! The keycode for the “Home” button is “Home” and the keycode for the “Recent Apps” button is “App Switch”. Once you are done setting up everything you'll see the Galaxy S8 navigation bar smiling at you.

Authors Desk

'Paphonb' did a great job in coding Custom Navigation Bar, the app brings excessive features to its abode and all this does not require any root privilege. Apart from the ability to set or add custom buttons to your existing navigation bar, Custom Navigation Bar also permits you to customize your navbar layout and the app has been integrated with tasker for the contextual navbar. To wrap things up, custom navigation bar brings the Android O navbar customization feature to your Android N device without rooting and the app is easy to set up.

Sunday, 21 May 2017

How To Install Google Assistant On Your iPhone and iPad


Google I/O 2017 was a blissful one, as a lot of android users where filled with frenetic excitement. Google's annual developer's conference brought all the major engineers and developers together and the company made the biggest announcements you might have missed. One of the important keynotes was the launch of Google Assistant on iPad and iPhones. Yes!.. You heard me perfectly well, Google Assistant have arrived on the iOS to compete with Apple's Siri. Now this might sound meaningless, but the voice-enabled Google assistant won't replace the iPhone Siri. If you haven't heard of Google assistant before, then i guess you are living under a rock. Google assistant is an AI just like Microsoft Cortana and Apple Siri. Its your personal assistant that can efficiently carry out various task on your device. All you need do is, ask it questions, tell it to do anything it'll carry out the task amicably. Now if you're anxious to see how the Google assistant looks on iOS, here's how to install it in any country.

Also Read: How To Enable Picture in Picture Mode On Your iPhone.

Change Region

Google assistant is available on the Apple Store, but it's only restricted to citizens in the United States. This is quite frustrating, as Nigerians and other countries can't get it. But there is always an easy workaround. So to get this one going headover to General via iPhones Settings menu. Select Language & Region, then set your devices​ language to English (U.S).  Now open Google Assistant on your iPhone via the App Store, this will prompt you to change the App Store to U.S region. Simply tap on "Change Store", then scroll all the way down from the featured tab and select Apple ID. A pop-up menu will appear, hit Sign Out.


Create New Apple ID

Now tap on "Sign In" again, this time select Create New Apple ID and on the next page, choose United States as your country then tap "Next". From here, you will need to provide necessary informations such as your email and password for your Apple ID creation then tap next. On the next page select "None" as your payment method, fill out other details and input any random address and pin code from the United States. Once done, tap next and a verification email will be sent to you via your Gmail account. Simply verify the mail to complete your Apple ID creation.


Install Google Assistant

Now search for Google Assistant on the App Store, once found tap on the result then hit "Get" followed by "Install".  The App Store will prompt you to enter the password for email, simply provide this information and Google Assistant will start downloading on your iPhone or iPad. That's all, you can now setup and use Google Assistant on different regions such as Nigeria, India​, Australia etc.


First Look at Google Assistant on iPhone

The Google Assistant seems to work well over here in Nigeria, simply open the app on your iPhone and tap continue. From the next page, tap "Yes I'm In" to give Google Assistant permission to help you in working accurately.


Hit Next on other options, when you're finished setting things up, click on the microphone icon then hit OK in other to use your voice to interact with your assistant. Ask the AI questions, tell it to do anything and see how fast it processes all your queries.

Friday, 19 May 2017

7 Best Samsung Galaxy S8 and S8+ Cases and Covers You Can Buy


galaxy S8 and S8+ cases and covers

Samsung Galaxy S8 and S8+ unravelled a lot of features that's quite indefatigable, it's one of those phones a metatron would've used if he arrives on Earth. Samsung totally wrap off the Galaxy S8 and S8+ design, with its infinite display, which gives both device a bezel-less, full-frontal and powerful edge-to-edge screen. You'd agree with me that both phones are quite suitable for personal task. Coupled with 4GB of RAM and 64 GB of expandable memory, it's the device most perfect for gaming. The Galaxy S8 and S8+ carries an IP68 dust and water resistance, combined with the latest Android 7.0nougat and bixby assistance. Now if you've recently purchased the Galaxy S8 or S8 plus, then it's about time you start personalizing them with colorful cases and covers. So here's the best Samsung Galaxy S8 and S8+ covers or cases you can buy.

1. S-View Flip Cover With Kickstand


The S-View Cover for the Samsung Galaxy S8 and S8+ is a beautiful cover that allows you to quickly view and interact with your device screen while the cover is closed, thus you'll be able to respond to incoming calls, messages, alarm, battery life, time & events. S-view flip cover was specially crafted for the Galaxy S8 and S8+ to give it a perfect fit, so it won't impede the use of functions such as the headphone, charging ports, power & volume buttons. One major benefit of the S-view flip cover is that it protects your S8 and S8+ from scratches. The S-view flip cover also features a built-in kickstand that auto props the phone up making it perfect for landscape media viewing​ and this allows you to view the galaxy S8 and S8+ infinitely brilliant screen.

Buy For Your Galaxy S8 ($49.99)

Buy For Your Galaxy S8+ ($49.99)

2. Soft TPU Silicone Back Cover Case


Samsung Galaxy S8 and S8+ offers a smooth and awesome curve that feels great in the hand, now why not go ahead and apply a soft tpu silicone cover that'll smoothen your Galaxy S8 and S8+ the more. The Soft TPU silicone back cover is a stylish, elegant and high quality case that provides cool durable protection on your Galaxy S8 and S8+. The cover protects your phone back and frame from scratches, fingerprints and dusts. It blends prefectly with your Galaxy S8 shape, so you will be able to access all buttons without stress. Soft tpu silicone cover does not add any extra weight to your Galaxy S8 and S8+, the case is light-weight, simple and moreover it was crafted or made from a soft silicon materials, making it extremely easy to clean. You can clean it with water and detergent and see how shiny, attractive and elegant it looks.

Buy For Your Galaxy S8 ($7.88)

Buy For Your Galaxy S8+ ($7.88)

3. Keyboard Cover


Galaxy S8 and S8+ offers a tactile keyboard with flexible and smooth experience. Now if you want a genuine keyboard cover for your Galaxy S8 and S8 plus, then you're probably seeing it now. The Samsung Galaxy S8 and S8+ keyboard cover provides protection to the keyboard on your Galaxy S8, there's no hindrance in typing neither is there a need for charging. This keyboard cover offers a standard and convenient functionality, and thus you will get to experience a mechanical Qwerty keyboard on the Galaxy S8 and S8+. You don't need to pair your S8 plus with the keyboard cover, just snap or clip it onto the front and start typing. Your Galaxy S8 and S8 plus will adjust automatically in other to accommodate the keyboard. Now when you are not using the keyboard cover, simply clip it on the backside of the protective cover & there's no need to separate battery.

Buy For Your Galaxy S8 ($29.99)

Buy For Your Galaxy S8+ ($49.99)

4. LED View Wallet Cover


The Samsung Galaxy S8 and S8+ LED view wallet cover is a unique multifunctional case with pertinent information & it shows the LED notification on the outside. The LED lights allows you to control your Galaxy S8 and S8+without opening the cover. Thus you will be notified of incoming calls, messages and alarms. You can also answer or reject calls by swiping the LED cover. One unique feature of LED view cover is that it automatically sends your Galaxy S8 and S8+ to sleeps when the cover is closed and it wakes up your phone when the cover is opened. LED view wallet cover brings a luxurious design and the installation manual is quite simple. Just align the bottom edge of your S8 within the bottom edges of the case. Push your S8 into the case while making sure that all four corners snap/fit into place securely.

Buy For Your Galaxy S8 ($17.99)

Buy For Your Galaxy S8+ ($17.99)

5. Alcantara Cover


Alcantara has always been a durable strong material that provides a case with a sucede hand feel experience. The alcantara cover was designed specially to offer an excellent protection on your Galaxy S8 and S8+. Thus it'll guard your phone against damage when placed face down on a smooth flat surface. The back of Alcantara cover protects your device from any form of scratches, bumps or splash. The alcantara case brings a slim and this will ensure that your Galaxy S8+ won't incur any unnecessary bulk. It is completely light-weight and it'll maintain your Galaxy S8 and S8+ body perfectly, making it to look fresh and new just like when you unboxed it. The alcantara cover offers a perfect fit on your Galaxy S8 and S8+, so it won't impede the use of any functions, such as the power and volume buttons. In summary alcantara cover is a geniune case that can serve as a stain-resistance on your Galaxy S8 and S8+.

Buy For Your Galaxy S8 ($39.99)

Buy For Your Galaxy S8+ ($40.41)

6. Two Pieces Cover


The Samsung Galaxy S8 and S8+ two piece cover is a stylish case that can liven up your phone with different colorful shapes. It will perfectly fit on your Galaxy S8 phones, as it adds a unique vibe in a playful style and this attaches securely and can easily suction to enhance or add an extra dimension to your Galaxy S8 and S8+. The complimentry hues on the two pieces cover makes your phone more lovely than ever. Installing two pieces cover is perhaps a simple task, once you've purchased the cover, simply clean your phone surface. Now remove the protective film attached at the back of each cover piece, then align the top pieces of the cover with the edge and camera on your Galaxy S8 and S8+. Now press it firmly to suite in, repeat the same steps ​with the bottom piece and press firmly again. Overall, two pieces cover is the perfect case that can protect the corners on your Galaxy S8 and S8+.

Buy For Your Galaxy S8($16.15)

Buy For Your Galaxy S8+ ($16.15)

7. Clear Protective Cover 


Clear protective cover is a stylish, durable and easy-to-hold protective case that can adequately wrap your Galaxy S8 and S8+ and yet still maintain the unique extra-ordinary shape. The case provides a flossy finish and it combines edge to edge plastic protection with minimal or no bulk. Clear protective cover maximizes the exposure of your Galaxy S8 and S8+ design with the hard plastic edge that protects the corners of your phone. The clear protective cover fits tightly on the Galaxy S8 and S8+ and in this way, it provides a rigid shell that can protect your phone body from scratches, bumps, drops and prevent dirt build up. Clear protective cover installation process is quite effortless and this can be done in a matter of seconds. The case doesn't resist the functionality of your Galaxy S8 and S8+ as it has been designed to give easy access to all the ports and buttons on your phone.

Buy For Your Galaxy S8 ($19.00)

Buy For Your Galaxy S8+ ($19.40)

Which Cover and Cases Is Your Favorite?

Samsung Galaxy S8 and S8+ offers plethora features and functionality, now if you are lucky to be an S8 user, then there's a need to protect it with the most affordable ultra slim cases that won't add any extra bulk to your phone's​ weight. The above listed cases and covers are the best from our lists, as they provide long durability, stylish and smooth experience. Now unveil to us, which is your favorite Galaxy S8 and S8+ covers and cases.

Thursday, 18 May 2017

Get the Ultimate Galaxy S8 Features On Your Android Phone


Get the entire Galaxy S8 features such as the icon packs, launcher, navigation bar, wallpapers, ringing tone, weather and clock widgets.


The Google Pixel reign was a long one, and now the Samsung Galaxy S8 has emerged to take over power. Before now, we've seen a lot of concept images and expected features of the Galaxy S8, this are no longer rumors because the Galaxy S8 has surfaced with a new look and redesigned UI. The Galaxy S8 and S8+ marks the new phase of Samsung's upcoming smartphones, with the S8 unique design and top notch features, you'd agree with me that something more classic and flamboyant will resurface sooner or later. Samsung Galaxy S8 and S8 plus brought some exclusive features that aren't available on the S7 device.
Also Read: How To Get Galaxy S8 Bixby Assistant On Your Samsung Device.
Firstly, the Galaxy S8 unveiled a rounded display corners, coupled with an on-screen navigation keys. In this way, Samsung got rid off the physical hardware buttons and the S8 also broke free from the confines of bezels. Now if you have recently upgraded to a newer Android device, or you couldn't afford $700 to purchase the Galaxy S8, then you might be wondering how to brings all the exclusive Galaxy S8 features to your Android phone. Think no more, for in this article we are going to unveil the best way to experience the Galaxy S8 features on your current device.

1. S8 Launcher

S8 launcher

Samsung Galaxy S8 hit the shelves with an elegant and smooth launcher that'll gladly replace the TouchWiz Home. Visually, the new S8 launcher does not seem completely different from the S7 edge launcher, but it offers a smoother experience and brings handy features. The S8 launcher unveils a swipe-up gesture that opens the app drawer and there's a quick search for various apps. Now installing the S8 launcher will require you to clear the old TouchWiz Home data and uninstall previous updates in other to avoid force close or unable to install error. To do this, head over to Settings -> Apps -> TouchWiz Home, then select Storage and Clear Data followed by uninstall updates. Next download the S8 Launcher and install it on your device, now hit the home button and select TouchWiz Home as your default home launcher. The S8 launcher works only on the Galaxy S7 and S7 edge running on 7.0 Nougat.

2. S8 Icon Pack

S8 icon pack

Getting the ultimate Galaxy S8 features will certainly not be complete without the icon pack. The Galaxy S8 and S8+ unveils a new redesigned icon pack that looks smoother and classic. The rounded icons reminds me of the pixel icon pack, but getting a little bit closer, you do agree with me that the icons mimics that off symbian belle. The Galaxy icon pack looks pretty cool, and there is a way to taste it on your current Android device. Having vetted the Google Play Store we found the perfect replica of the Galaxy S8 icon pack. However since the default S8 launcher doesn't allow you to customize or change the icons on device, you'll need to install Nova Launcher as it allows you to change the default icon themes. To get this one over with, head over to the Google Play Store and install UX Experience S8 - Icon Pack. Then go to Nova launcher Settings -> Look & feel -> Icon themes and select the S8 icon pack.

3. S8 Wallpapers and Ringing Tone


Just like the Google Pixels, Galaxy S8 and S8+ brings a huge collection of beautiful stock wallpapers that you'll love. Most of these wallpapers are in QHD, and they'll suite your Android device perfectly. If you have been eager to experience the entire Galaxy S8 stock wallpapers on your phone, then it's about time you start downloading them. The exclusive Galaxy S8 wallpapers are in 2960 x 2960 high resolution, you will get to experience stunning gradients, night sky, geometric and abstract HD wallpapers. Download the Galaxy S8 stock wallpapers and ringing tones now.

4. S8 Navigation Bar


Galaxy S8 and S8+ where the first Samsung device to use softkeys, now if you are a fan of Galaxy S8's on-screen nav bar, here is how to get it on your Android phone. First your device must be rooted, then download and open xposed Installer, now head over to the "download section" and search for "Galaxy S8 Navigation Bar". Tap on the result, then swipe from the left to navigate into the version tab and install the module. Alternatively, you can download Galaxy S8 Navigation Bar from the Google Play Store. Now to activate the module, simply open the xposed installer app and head over to the module section. Then tick Galaxy S8 Navigation Bar option. Now head over to the "framework" section and perform a soft reboot. Once your device is back on, you will see the S8 Navigation Bar working perfectly.

5. S8 Weather & Clock Widget With Search Bar

get S8 weather and clock widget with search bar

Galaxy S8 unveils a pretty minimal weather and clock widget coupled with an eloquent search bar. Now if you've ever wanted to taste the S8 search bar and widgets, then it's quite possible. We have recently found some cool Zooper widgets that replicate the S8 clock, search bar and weather widget. These widgets where created by the XDA developers "thanhtuan1611 and ramoneluis" and it can be implemented without rooting. To get this one going, download S8 Weather widget and Search bar (Zooper widget pro included). Then download the clock widget. Open Zooper Widget Pro to initialize the folder in your memory. Now extract the contents on Y.S8_Weather.rar and Templates_1_.zip.


Then copy the .zw files to ZooperWidget/Templates. From here, long press on the home screen and select "Widgets". Now scroll down to the bottom of the widget list and select Zooper widget. (We recommend 2×3 for the clock / weather widget and 5×1 for the search bar). Now tap on the empty zooper widget you just created from the home screen, then select SD Card and choose the widget you prefer. The search bar works just like the Google search, simply tap on it to open the Google app, then hit the micro icon to use the Voice Search. That's all with the Galaxy S8 exclusive features.

Friday, 12 May 2017

How To Remove Unwanted People and Objects From a Photo


Alot of people loves to travel for pleasure, and during this period of tourism you are mostly been accompanied with your digital camera in other to take a perfect or clear shot at a fantastic view, circus or scenery. If you are into tourism, taking a picture of a landmark can be quite difficult, imagine a situation where you've positioned your camera to take a clear picture of a natural view, and just when you're about to release the shutter, someone walks straight in front of your camera. Dude!.. you have just been photobombed. An animal or someone have deliberately ruined your picture. Now you may not notice the photobombing on time, not until you get home and James will ask "hey! Is that a girl on the background?".
Also Read: How To Remove Watermark From a Photo.
Removing unwanted peoples, animals and objects from a photograph requires lots of skills, however there are a ton of softwares and online tools that can adequately get rid of photobombs from your pictures. Most of this tools doesn't require any photo-editing skills, as they're easy to use and can get rid of unwanted people and object from a photo with an incredible ease. If you are ready to remove those goofy strangers, animals and objects from your photograph, here is how to get started...

A spectacular background or scenery that has been photobombed!. Let's remove those goofy strangers and animal.

Install Inpaint

To begin with, you'll need to download and install the software inpaint on your Windows or Mac OS. Inpaint is an incredible tool that can remove unwanted people from a photo in literally less than one minutes, but since good things doesn't come easy, you'll need to pay only $19.99 in other to activate the program with the license key that'll be sent to you via email. However you can still use the free trial of the inpaint software to see how easy it is.

Load the Image with Unwanted People

Once you've downloaded and installed the inpaint software, the next step, is to load the image with the unwanted people and objects. So to get this one going, click on the upload icon at inpaint top menu, then browse through your gallery and select the specific image that was ruined with goofy strangers.


Select the People and Objects to Remove

Now it's time to get rid of the photobombs. Inpaint offers handy tools that can help to remove objects from a photograph easily. From the inpaint top menu, we have Open, Save As, View Original, Undo, Redo, Zoom In, Zoom Out, Normal View, Zoom to fit, Erase, Clear Selection etc. Now to remove unwanted people from the image you just uploaded, simply drag the marker or brush to select the people or objects you want to remove.

Remove them!

Remember you can easily zoom in to make a fine selection, and the marker size can be adjusted too. Now once you've selected all the photobombs, simply click on the erase (play) button and the photobombs will be removed magically. Now save your photo and enjoy the original spectacular scenery. In summary, inpaint is a great software as it removes photobombs with ease. There is no need to fiddle around, inpaint can make a finer precision.


Other Alternatives

Inpaint is incredibly simple, however not everyone can afford $19.99 to buy the full software with license key. But you can use Movavi Photo Editor.software, which can easily remove unwanted people, animals and objects on your photograph for Free. The software is available for Windows and Mac OS, and you can head over to movavi official site to read the instructions on how to use movavi photo editor to remove photobombers from images. Also if you find it awkward installing softwares on your PC, you can use this online tool webinpaint to get rid of photobombers, but this does not come Free either.

Photobombers removed!

Wednesday, 10 May 2017

7 Cool Google Chrome Tips and Tricks For Android


Google Chrome is arguably the undisputed and the most popular browser for Android device. Chrome is quite ubiquitous, as over 70℅ of Android users have safely installed it on their mobile. Google Chrome brings a ton of plethora features, thus you'll be able to enjoy a fast, easy to use, and secure web browser. Google apps are popular, and the chrome browser won't make an exception. Chrome offers a built-in Google translator, and this will come in handy for translating web pages. With the Google Voice Search integrated in chrome browser, you will be able to type less and talk more. The Google Chrome browser offers recommendations for news articles, and it shows quick links for your favourite websites.
Also Read: Top 10 Most Useful UC Browser Tips and Tricks For Android.
While the above mentioned features seems to be intriguing, the juice isn't complete yet believe me!... Chrome for Windows or Mac OS offers a ton of useful extensions which gives you access to advanced features. But you certainly won't be able to install any of this extensions on your Android device. In other not to be saddened, we are going to unravel the most useful and incredible tips and tricks for Google Chrome browser on your Android device. So if you've got your mobile ready, here's how to make Google chrome browser dazzle flamboyantly!.

#1. Reduce Data Usage

The Google Chrome browser drains a lot of data whenever you're surfing the internet, from experience loading a single webpage on the chrome browser will approximately drain about 5mb of your mobile data. Now saving the amount of data usage on your chrome browser is quite easy, simply go to Settings >> Data Saver and toggle "ON" this option.


From now onwards, Google Chrome will automatically compress the pages that you visit, and it will also enable the Google Safe Browsing system which will help to detect malicious webpages and protect you from phishing and malware. Simply take a close glimpse at the data saving graph to see the percentage and number of data saved on an original webpage after compression.

#2. Switch Tabs Faster

Switching tabs on Google Chrome browser is perhaps too simple, as this process will only require you to tap on the "tabs" icon and thus you can be able to scroll through the lists and select the tab you prefer. But switching tabs on the Chrome browser will be efficient if you do it more faster. Apart from the default method of switching tabs on the Chrome browser, we've two other simple ways to switch tabs more faster.


The 1st method of switching tabs from the chrome browser is quite simple and more faster. Simply swipe left/right or across the address bar to switch between tabs. Now to the second method, you can easily swipe down from the address bar to see the full lists of tabs. Tap the one you prefer and it'll launch automatically. Both methods seems cool and more convenient, and it is worth mastering.

#3. Browse through your SD Card Files

Every Android phone that ships in with the Google Play Store have the Google Chrome installed as default browser, but if perhaps you don't want to install a third-party file manager or you simply want to save your device's storage space, then there is a way to browser through the files on your phone memory card via the chrome browser.


To begin with, open Google Chrome from your device's app drawer, then copy and paste this URL file:///sdcard/ into the Google Chrome address bar. This will automatically show you the memory card file directory and you can securely browse through the files on your phone from the Google Chrome browser.

#4. Move the Address Bar to the Bottom

Google Chrome brings a lot of hidden and essential experimental features which can come in handy on certain situations. Let's assume for instance that you are using a tablet with larger screen, then you will certainly find it difficult reaching the top of your chrome's address bar in one-handed mode. The Google Chrome URL bar is situated at the top by default, but we can bring it to the bottom by using the Google home flag.


So to get this one going, copy and paste this URL chrome://flags/#enable-chrome-home into Google Chrome address bar, you will notice a highlighted text (Google Chrome) which is in yellow color. Tap on the default box beneath the highlighted text, a pop-up menu will appear. Simply select "Enabled" from the option, then hit "Relaunch Now" for changes to take effect. To reverse this trick, change the flag to "Default" and then relaunch the chrome browser.

#5. Switch Between Search Engines

By default, the Google Chrome allows you to find information via the Google search engine, But if perhaps you are bored from using the default Google Search engine, then you can easily switch between search engines and continue your internet surfing more conveniently.


To get over with this one, open the Google chrome menu and navigate to the Settings option. From here, just below the "Basics" hit on the "Search Engine" option. You will be able to see four different search engines namely Google, Bing, Yahoo! UK & Ireland, and Ask Jeeves. Simply select the one you prefer and tap Save.

#6. Enable Reader Mode

The overall idea of enabling reader mode on Google chrome is to make reading more easier and convenient. The Safari browser in iOS 9 offers a unique reader mode which comes in handy for removing all the non-important element within a webpage. Thus you won't be bothered with annoying ads, and links to other sites. So you'll be able to enjoy a mobile friendly view. Reader mode on Google Chrome only appears when you are reading articles, so if you are eager to enable this juice then here's how.


Copy and paste this URL chrome://flags/#reader-mode-heuristics into Google Chrome address bar. You will notice a highlighted text (Reader Mode triggering) which is in yellow color. Tap on the default box beneath the highlighted text, a pop-up menu will appear. Simply select "Always" from the options, then hit "Relaunch Now". Now whenever you read an article, a pop-up will appear, asking if you want to make the page mobile friendly. Tap on it and you'll experience an easier reading mode.

#7. Access Google Chrome Experimental Features

Google Chrome offers a lot of experimental features which are hidden. By default this features aren't enabled yet, but if you want to tinker or enable them, then you'll need to know that some of the hidden features once enabled may change, break or even disappear at any time. The Google Chrome experimental hidden features are lined up under the "chrome flags", thus if you want to start with the tinkering, copy and paste this URL chrome://flags/ into the chrome's address bar.


Now we are done with the Google Chrome tips and tricks which you didn't know of, from the Google Chrome menu options, you can tick the "Request Desktop Site", so that you can be able to browse or surf in PC view via the Google Chrome browser. Also there's a dedicated option that allows you to find specific words or text within a webpage. You can even double tap to play the Dinosaur game whenever a webpage is not available via Google Chrome browser. In summary we've a ton of petty Google Chrome tips and tricks, but we've listed the one's that's most important.

Saturday, 6 May 2017

This Banana Phone Looks Quite Appealing


A newly envisioned, perfectly crafted and fully functional banana phone has come to exist. It seems the human race are running out of ideas, so new novelty are been made to continue the competition. Banana Phone is a stunning "Banana-Like" shaped mobile handset that connects to your smartphone wirelessly. This may look ridiculous, but it is awesome!. Imagine the fun, the all-eyes-on-me thing when you call your family and friends with a BANANA!. This new Banana phone, is a kind of device you can envision when you are consuming lots of beverages.

Banana Phone can't actually make calls on its own, so don't throw away your Android or iPhone yet because you will need to pair or connect it with an existing smartphone via Bluetooth. In other words, your iPhone or Android device should be placed in your pocket while moving around with Banana phone. The new Banana phone isn't a joke, as it offers some pretty smart features. You will be able to interact with voice assistant (Siri and Google Assistant) and make calls by asking them via the banana phone.


Banana Phone offers handy multi-function buttons, a Microphone, a Speaker, Charger and LED indicator. Banana Phone is quite appealing, so i will suggest you don't use it around the primates in the Zoo especially the Gorillas. But if you have a monkey pet at home, it will be so much fun giving her a banana phone. Speaking of which, Banana Phone reminds me of a popular childrens song that was released in 1994 by Raffi and Michael Creber. You do wish to own a pair of Banana phone after watching that hit.


Banana Phone inspires people to talk more and smile more. This yellow fruit (Banana Phone) will likely be available on the month of September 2017. The device will feature a 10 hours talk time and about 70 hours in idle mode. Banana phone can easily be pre-ordered at indiegogo for $40, and it's worth your money. Purchasing the Banana Phone can help to save the endangered mountain Gorillas through conservation, as 1% of all the sales made will be used for Gearing up 4 Gorillas. Now if you're ready to go Yellow, pre-order the Banana Phone now!.

Thursday, 4 May 2017

Double Tap to Wake Up or Turn Off Android Screen


Earlier today, i was instigated to figure out the perfect way to turn ON or OFF Android screen using the Double tap feature. If you are a regular custom ROM user, chances are your power button would have gotten weak due to constant reboot into recovery and you will certainly want to limit your device's power button usage. One of my buddy narrated how his device fell on the ground accidentally and the power key got broken. Now whenever he trys to use it, it usually gets stuck, and causes his phone to switch ON and OFF. The double tap feature can also come in handy whenever you find it difficult to press the power button on your phone or you simply want to preserve your physical power button.

Basically, there are two simple ways to get the double tap feature on your device, the first option is to flash a custom kernel that supports the double tap feature, while the second option is to use a third party app on the Google Play Store. Now you'll certainly concur with me that the second option is universal, as finding a custom kernel with the double tap feature could prove to be a tedious task and moreover it will demand for root permission. The Google Play Store offers a ton of Android apps that can bring the double tap feature on your Android device, but most of them brings limitations which won't be an hindrance either. Thus we're unveiling the best Android apps that can enable you to double tap and wake up / turn OFF Android screen.

#1. Smart Screen On/Off Auto

Smart Screen on/off is a simple application designed to automatically turn On or Off your Android screen by using a proximity sensor and double tap on the home screen. This will limit your device's power button usage and thus preserve it to last longer. So to begin with, head over to the Google Play Store and install Smart Screen On/Off Auto . When you open 'smart screen' for the first time, you will be greeted with a simple and easy-to-use interface, so you'll only need to tinker with the app settings.


There isn't much to set up here, under the "Auto screen settings", you can choose to enable the screen ON or Off automatically. You can also create a shortcut on the home screen to quickly turn off your screen. Tap on the "Create Shortcut" option, then input shortcut name and hit OK. Now under the double tap settings, toggle ON "double tap to turn off screen". Under the optimization settings, you can choose to enable the first option i.e if your device has a phone cover. This will auto turn on/off your phone when you open or close the cover.


As stated earlier on, Smart Screen can turn ON/OFF your phone by using the proximity sensor. Simply toggle ON this option under the "optimization settings" and then swipe your device through the 'proximity sensor' to wake up or off the screen. Next from the "advanced settings" option, you can choose to enable "show floating popup" which will turn off your phone more faster. Tinkering with smart screen isn't difficult, you'll only need brains. The app works pretty fine but with limitations.


Bonus Tips

Smart screen has its own limitations, as the app allows you to only turn off your device with a double tap from the home screen. It will be more perfect if the 'developer' adds the double tap to turn ON screen. However you can use other cool alternatives for this. Apps such as KnockON - tap to wake or lock and double tap to screen ON and OFF can do the jobs too. They are capable of turning on/off your device with a double tap. But don't expect a perfect or impeccable performance.